|
|
The Flat Stuff Gallery
This gallery is to show that my passion for working with timber isn't exclusively wood turning.
| |
|
|
DINING SUITE |
|

|
|
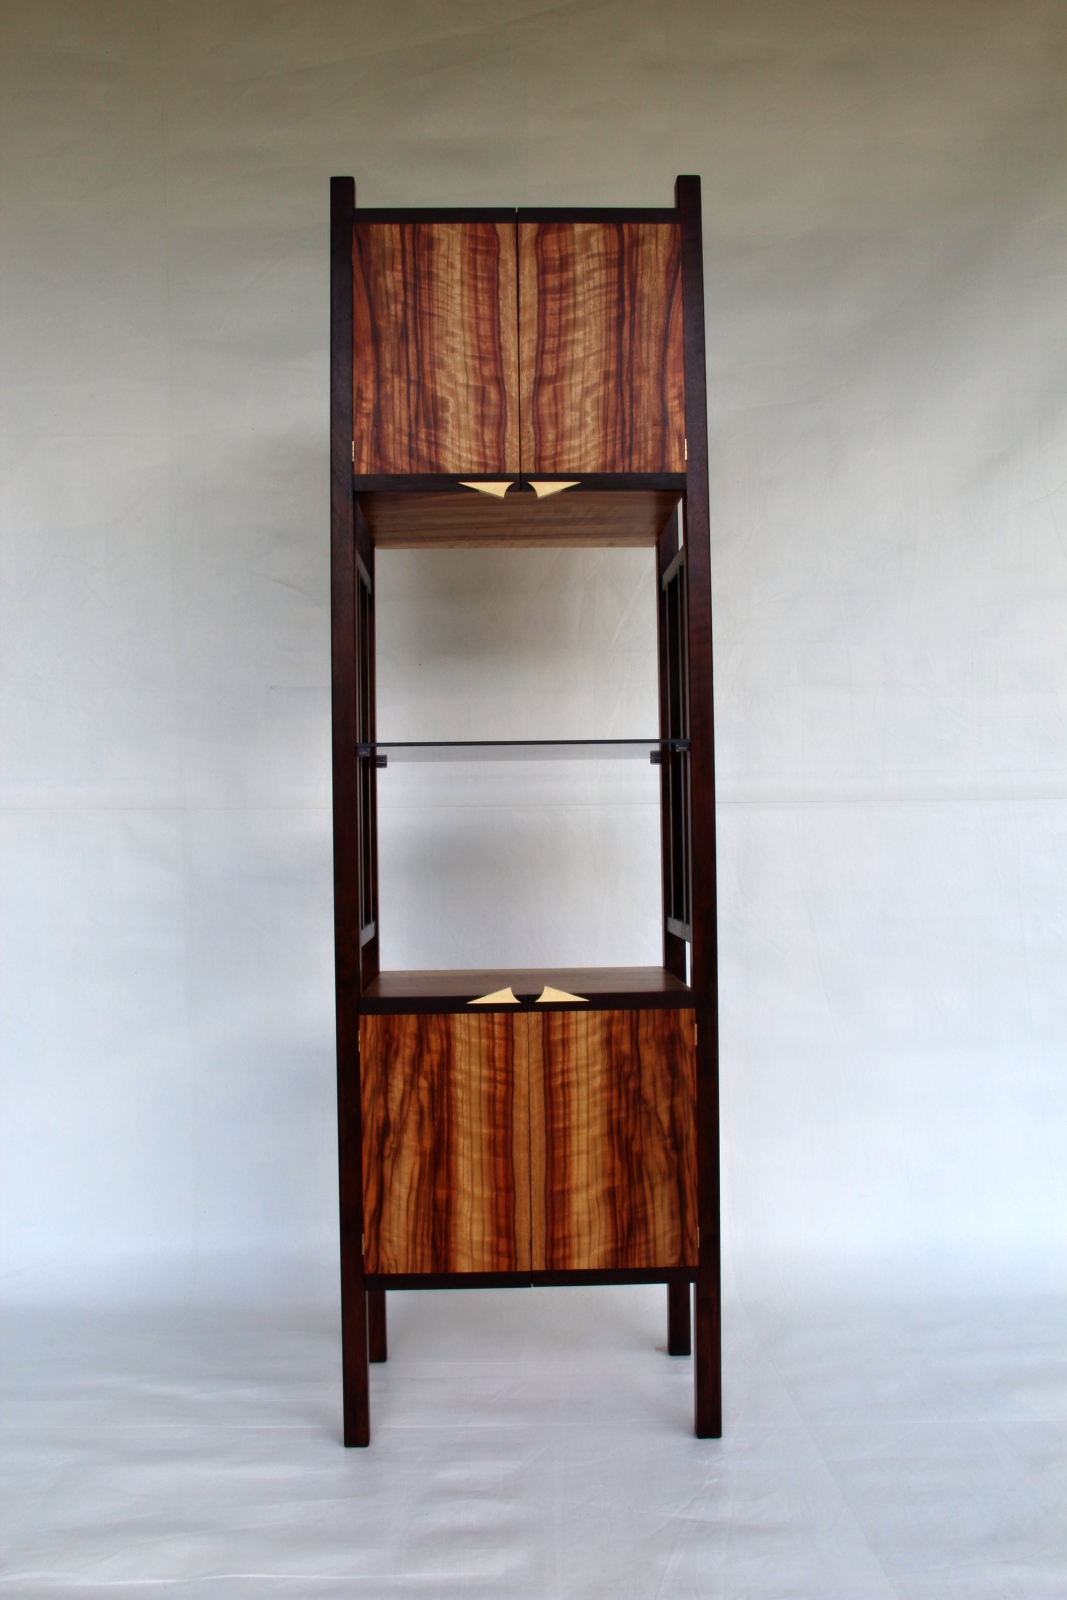
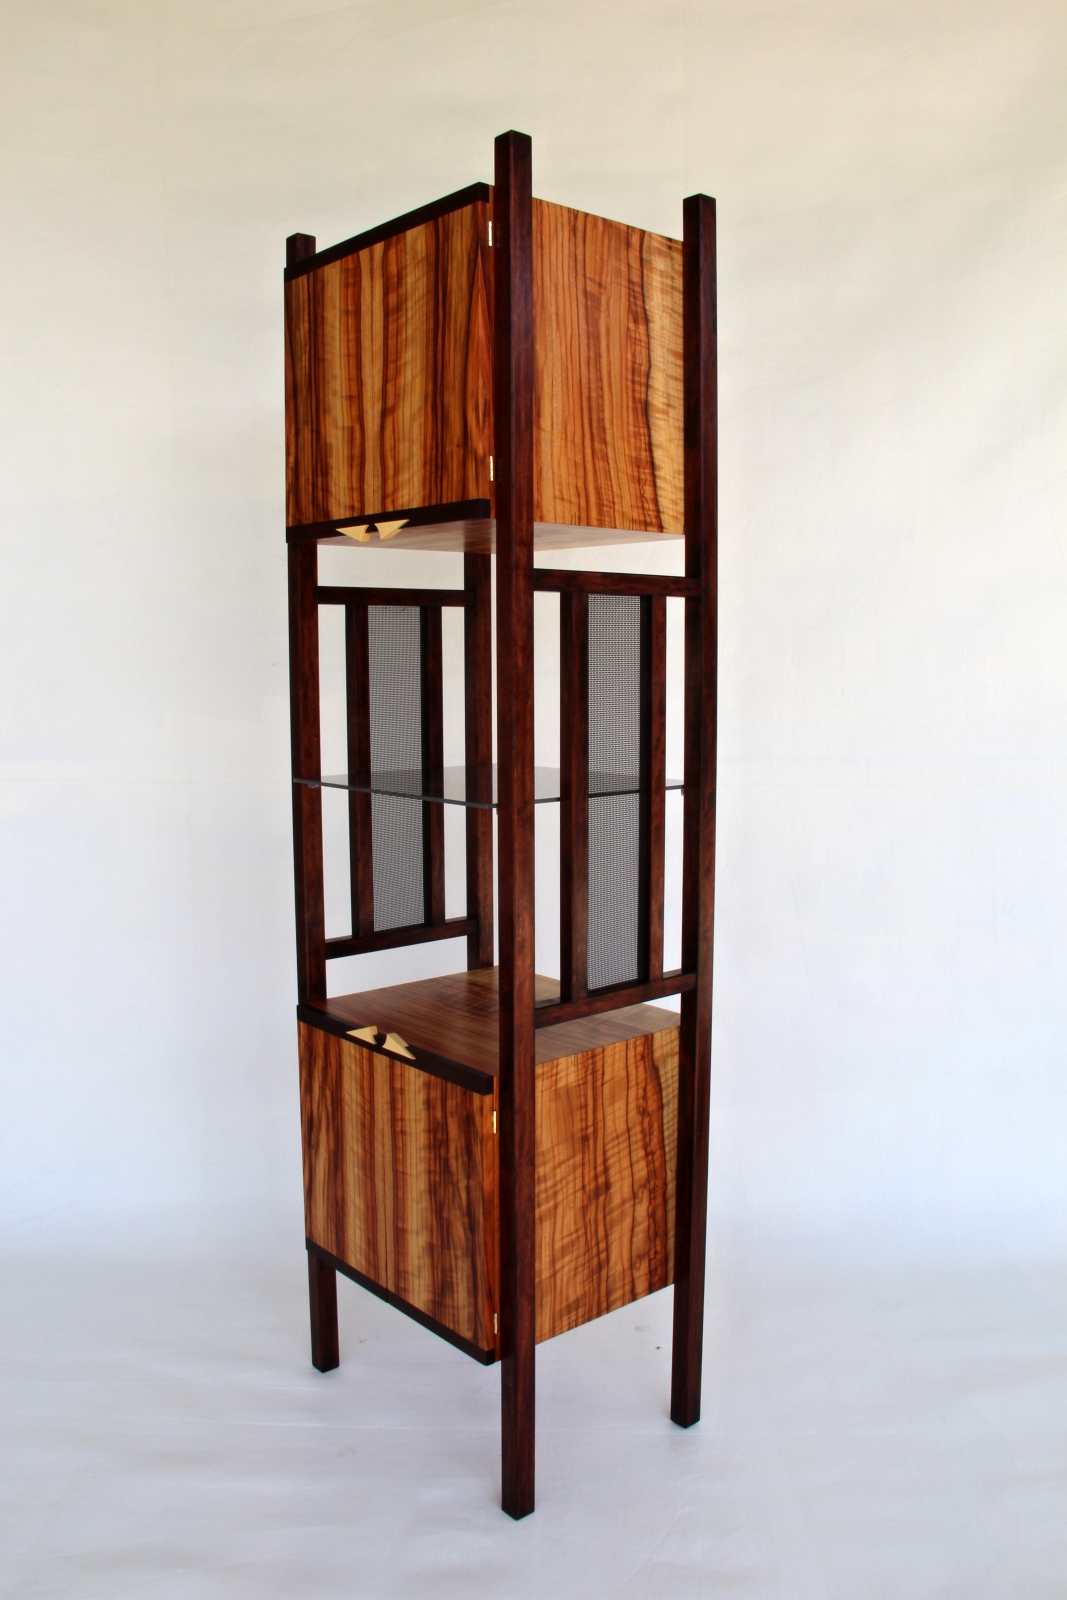
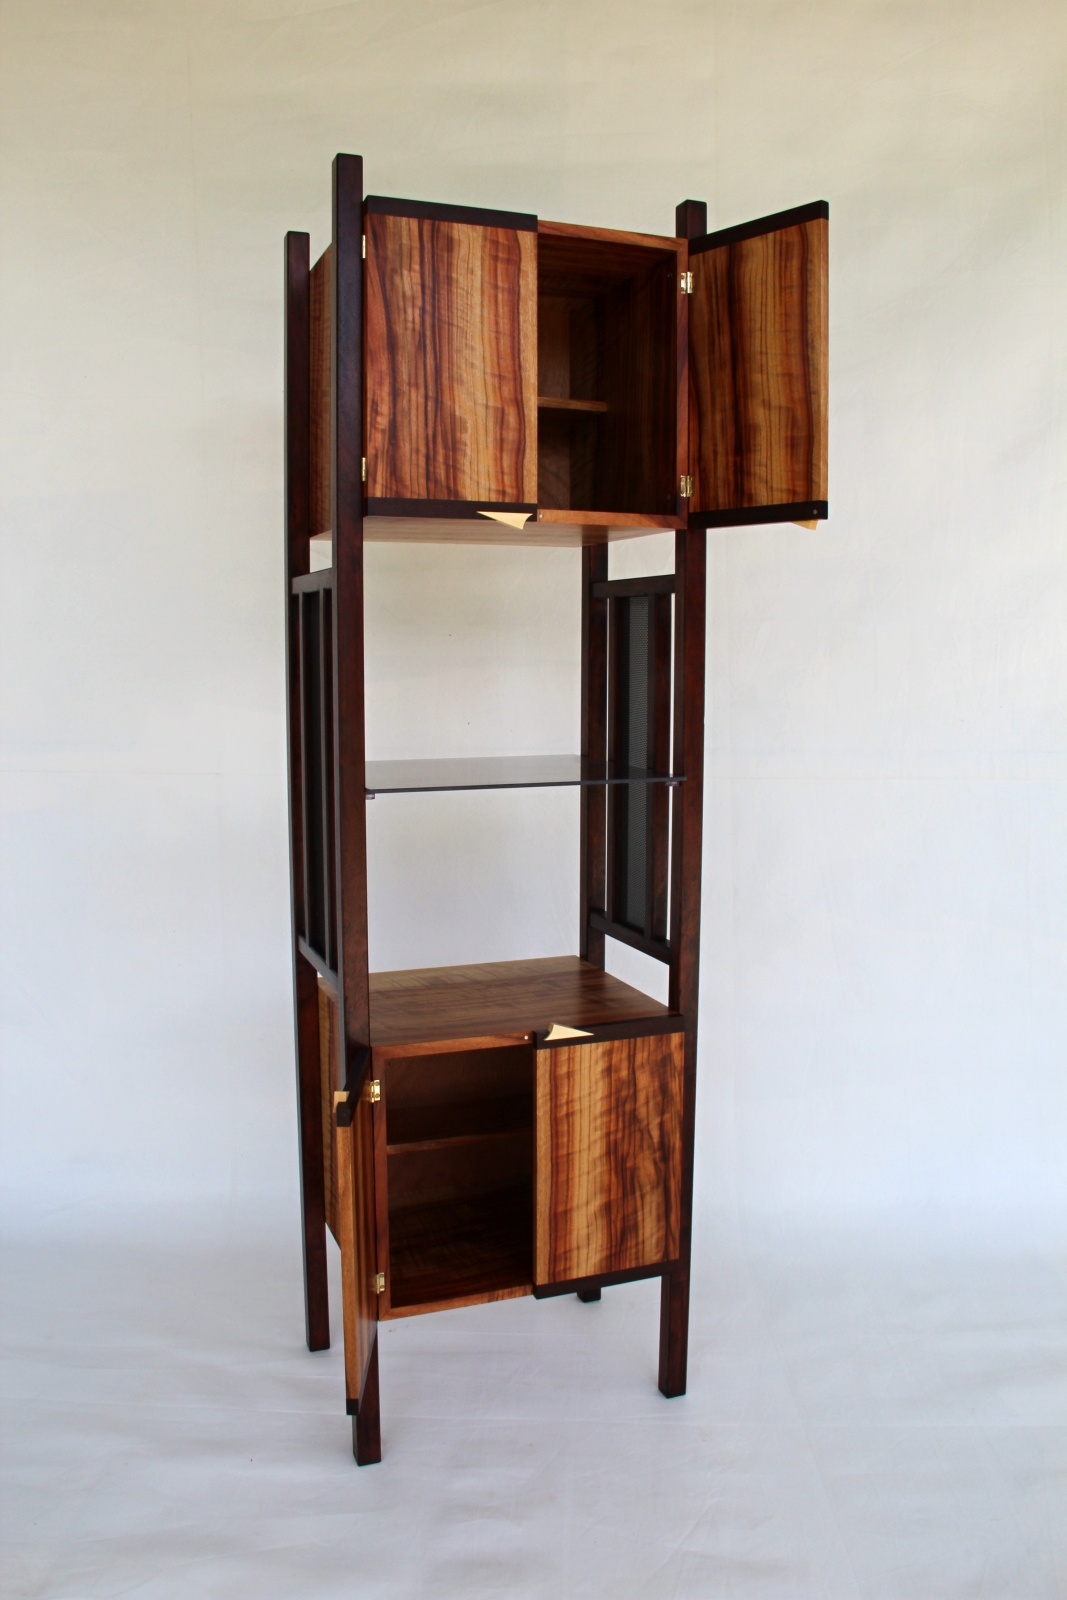
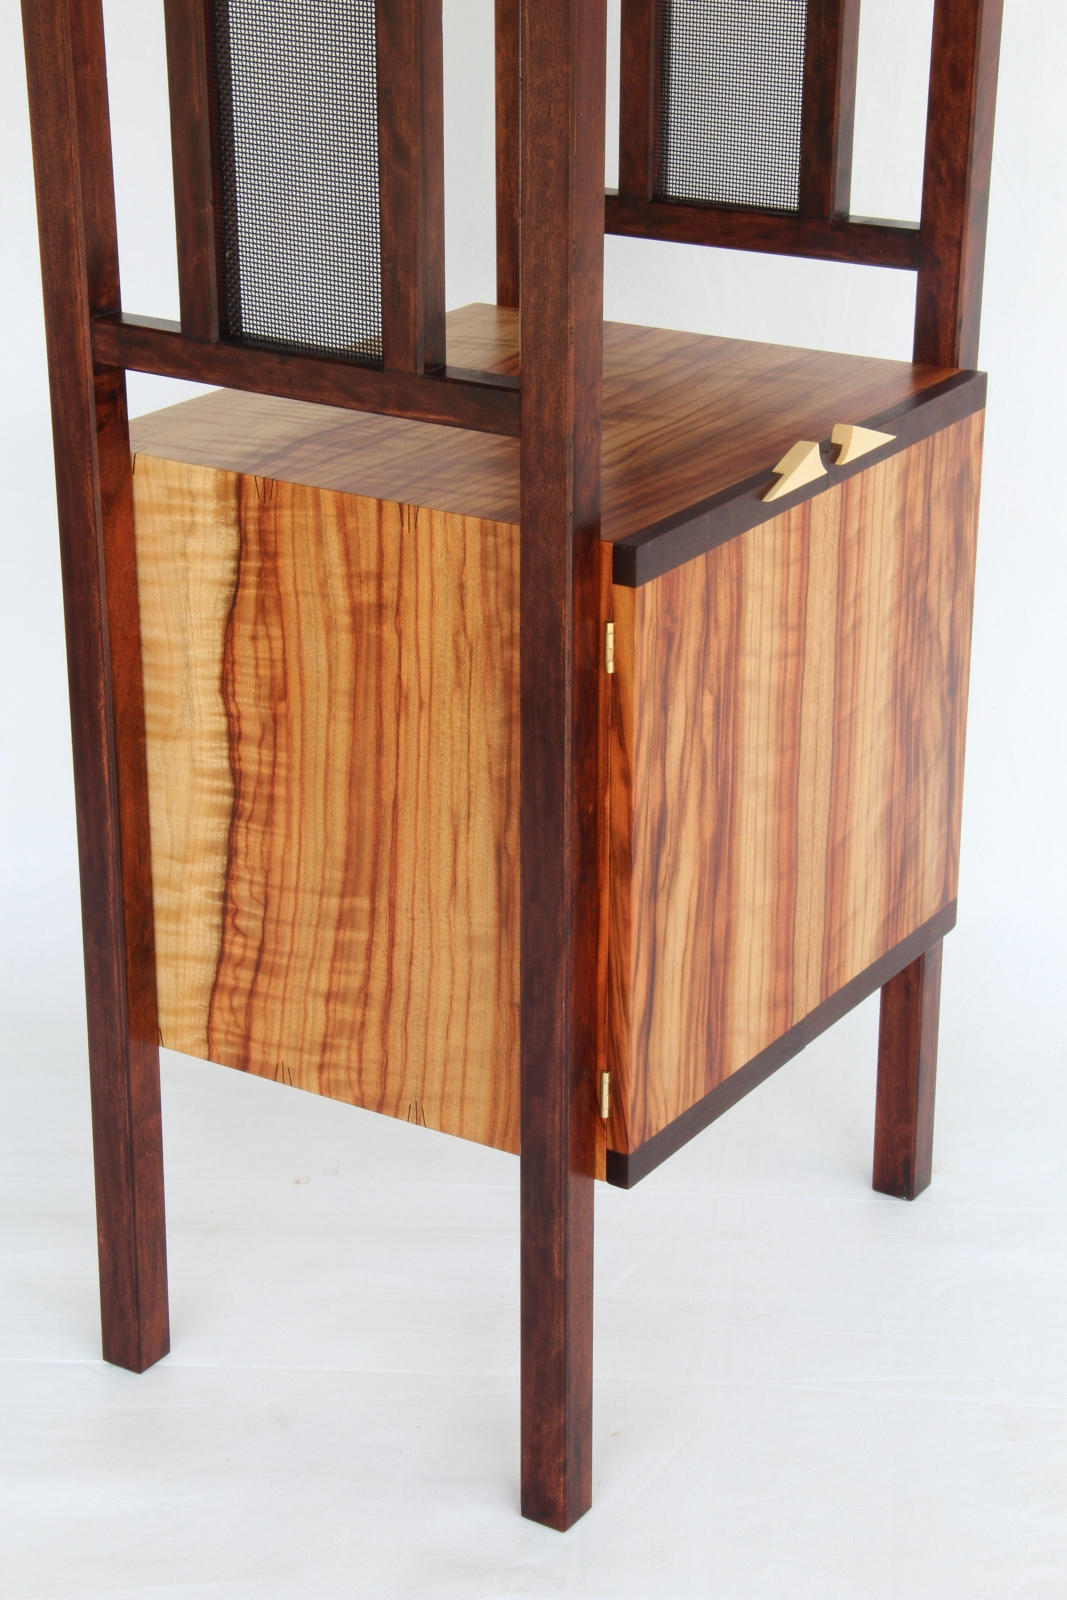
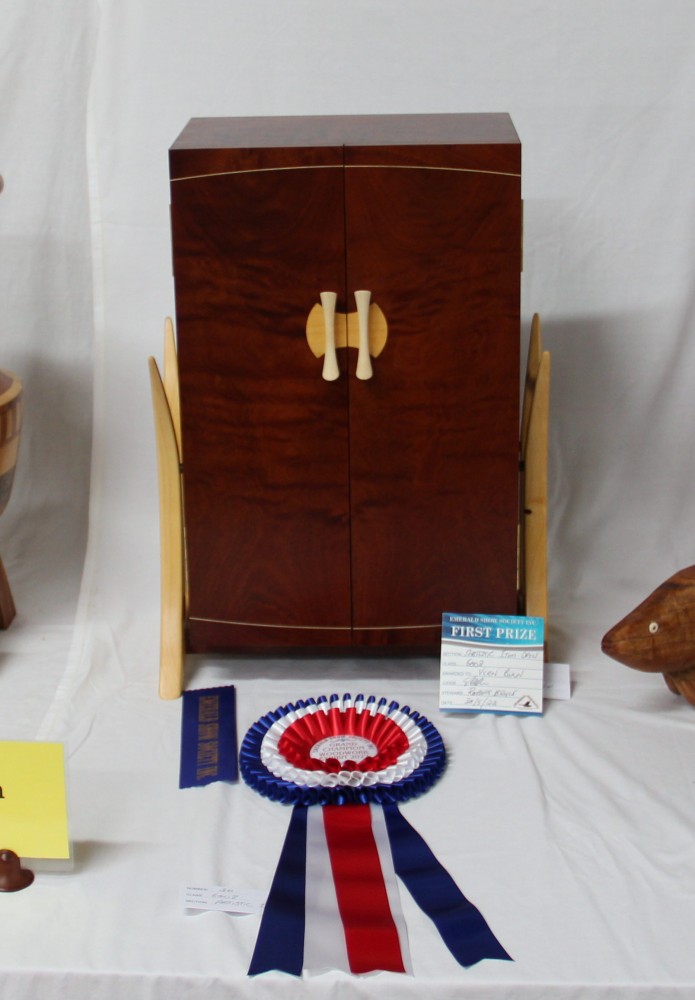
WHISKY CABINET |
|
|


|


|
|
|
|

|
|


|
|

|
|


|
|


|
|


|
|


|
|


|
|
|


|
|


|
|
|
|

|
|
|
|

|
|


|
|

|
|


|
|
|
|


|
|


|
|

|
|
|
|


|
|
|
|


|
|


|
|
|
|


|
|


|
|
|
|

|
|
|
|

|
|

|

|
|
|
|

|
|


|
|

|
|
|
|

|
|


|
|
|
|

|
|
|
|


|
|


|
|
|

|
|


|
|


|
|


|
|
|
|


|
|


In-situ with that whopping big pot-plant in place. |
|
|
|
|


|
|
|
|


|
|
|
|

|
|

|
|
|
|

|
|

|
|
|
|

|
|
|
|

|
|
|
|

|
|

|
|
|
|

|
|
|
|

|
|
|
|

|
|
|
|


|


|
|

|
|


This Queens-size bed is made from Sally Wattle slabs that just seemed 'right' for the job. The slats and support rails are Klinki Pine. Made using 'knock-down' brackets, it is still very sturdy but easily disassembled to be moved. |


The 'details' on the legs and covering the side-rail joins are made from Australian Ebony. The finish is Livos Kunos oil. |
|
|


This Hall table is made from a Kauri Pine that was growing in the Bluff State School grounds but had to be removed to make way for a new building. I designed and built the table as a gift for the terrific couple who collected the log for me - but I managed to squeeze it into our local competition out here before handing it over and scored a Champion ribbon for it! |
|
|
|
|

|
|
|
|

|
|

|
|

|
|
|
|
|
|


|
|
|
|

|
|

|

|
|
|
|

|
|
|
|
