All-in-One Sharpening Jig
I'm a jig sharpener and proud of it! I see no point in mucking around trying to freehand sharpen chisels - just a waste of steel and time (oops , too much off there, oops a bit off there to make up for it etc etc), and I like to know that each time I use a chisel, it's going to work exactly as it did last time I sharpened it! Most of the ideas in this system have been done to death but there a couple of little ideas I've included to suit the way I like to have things.My original washing-machine powered grinding rig finally died and as I had to re-hash things to adapt everything to another motor, I though I might as well re-hash this page as well.The rig is now powered by a 1.5HP motor from a floor polisher - a bit of overkill but when it's the right price (0$) !!!!Everything else is still the same except it is now much easier to compensate for wheel wear and it would be very easy to fit the rig to any other grinder.UPDATE: Well that motor didn't last long - no wonder I got it for free!!! Bit the bullet and bought a fair-dinkum grinder, and a diamond and a CBN wheel - no muckin' about from now on! Pics at the bottom of the page.<Back to Gadgets |
||
The equipment... |
|
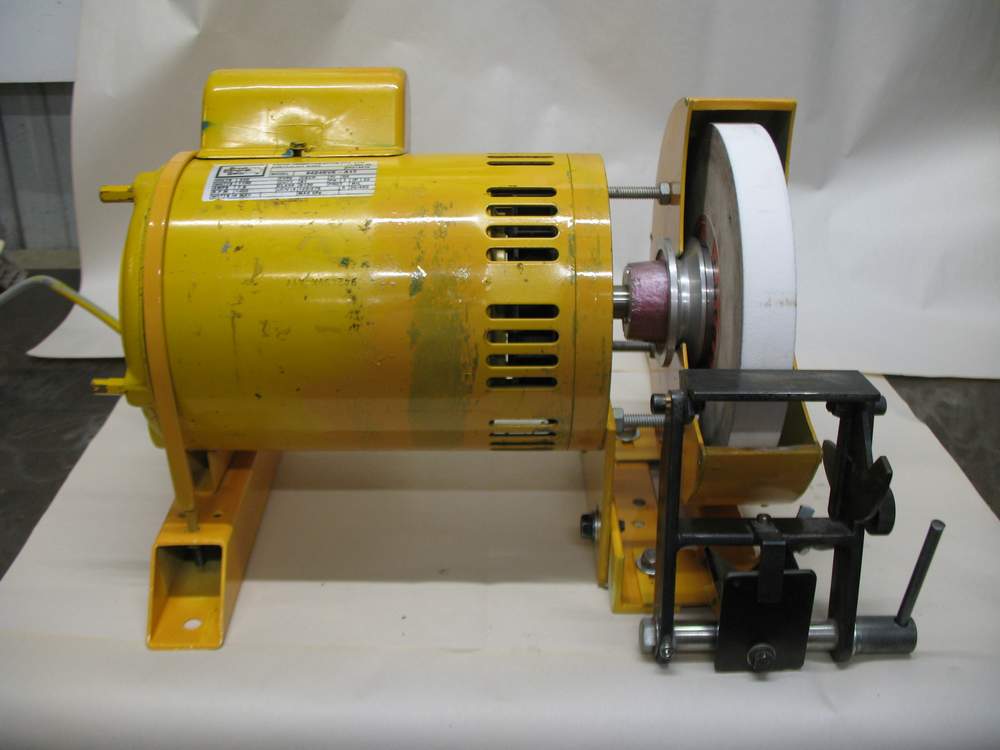
I've used 1450r.p.m motor again as I find this the best speed for sharpening with an Aluminium-Oxide wheel. This one is a bit heavy and over-powered but it was free and easy to mount on the bench. The wheel was fitted by screwing some 4mm plate with a 1/2" threaded hole in the middle to a V-pulley - might look odd but it runs true. | |

|
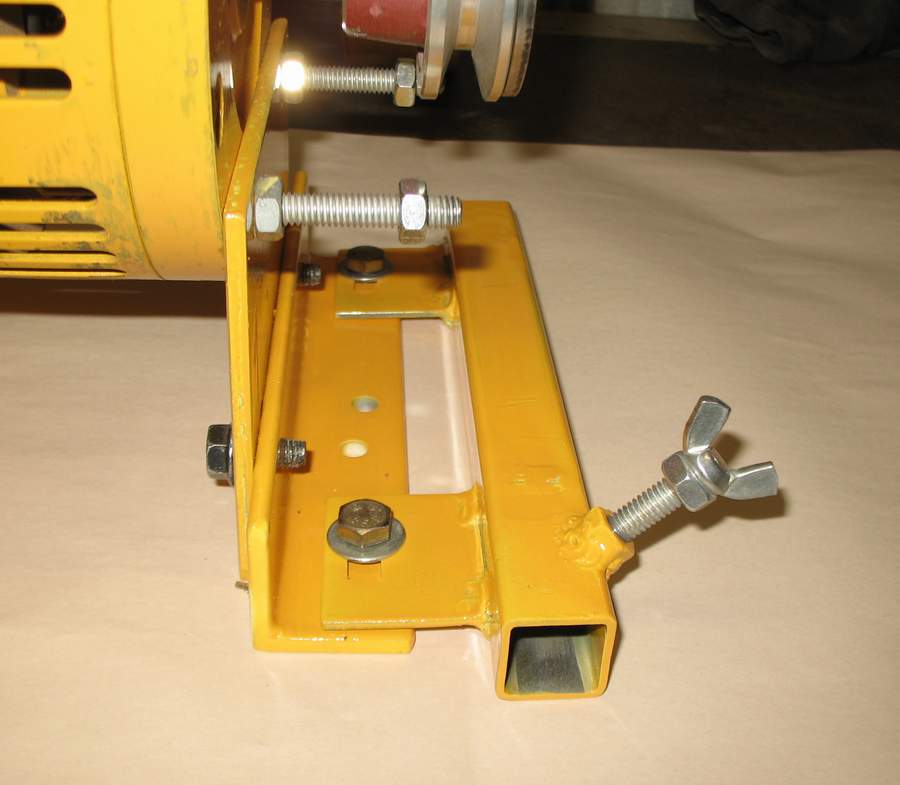
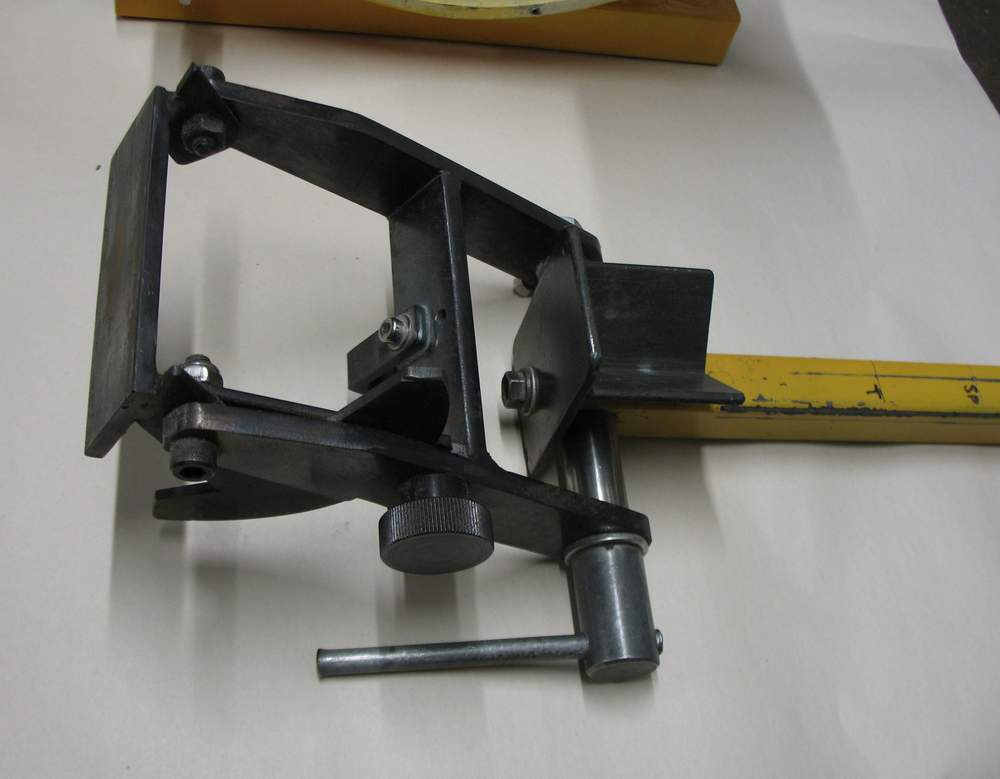
The 25mm RHS mounting tube for the jig is bolted directly to the motor mount through slotted holes for wear adjustment. This arrangement gives greater precision than having the jig bolted to a bench separately to the grinder and keeps the complete unit portable. |
|
|
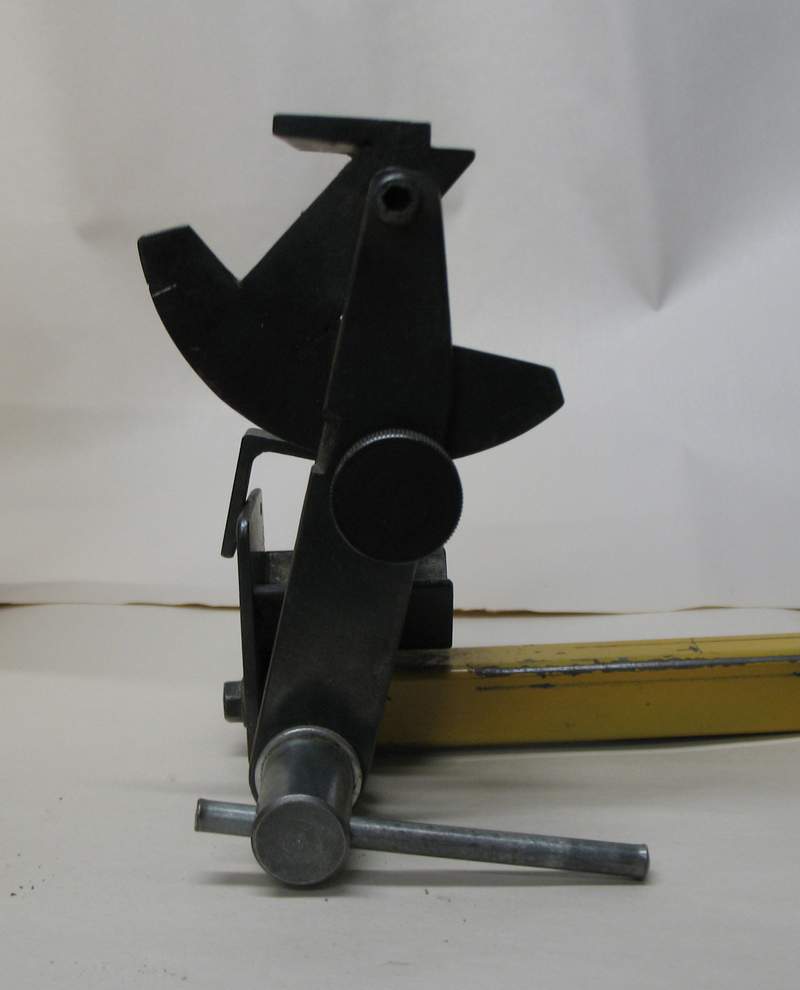
The main component is the jig itself with an adjustable tool rest that folds down to allow access to the pivot cup. I've fitted an adjustable stop so the toolrest always drops back to the correct place and it's only ever a split second away.The 20mm RHS sliding bar is a loose fit in the mounting tube so grinding particles don't bind and jam it. The locking screw in the mounting tube tightens the sliding bar corner-wise to ensure consistent positioning. |
|
The final component is the depth gauge for setting the amount of chisel blade protruding from the jigs - a bit rough but fully functional.Once I have ground a tool to a shape I'm happy with, it's just a matter of marking the angle on the jig or toolrest and setting a depth stop etc so that it's a breeze to touch up the same grind in seconds. |
| |
| Back to Top | ||
Using it... |

|
Left: My most used setting on the toolrest is my '0' mark (90° to the wheel) which I use to put an edge on my teardrop scrapers. A quick run around the edge with each face down in turn leaves a burr on both sides so it's a fair while before I have to touch them up again.Right: Setting the toolrest up about 5° is just right to rest the flat side of my 1/2 round Sorby hollowing cutters on for a touch up. |

|
|
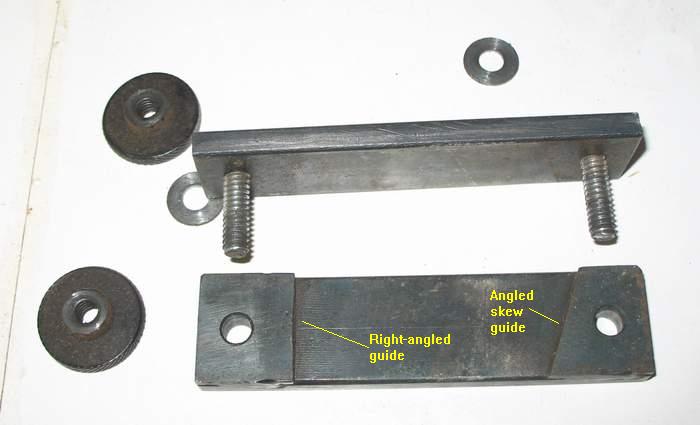
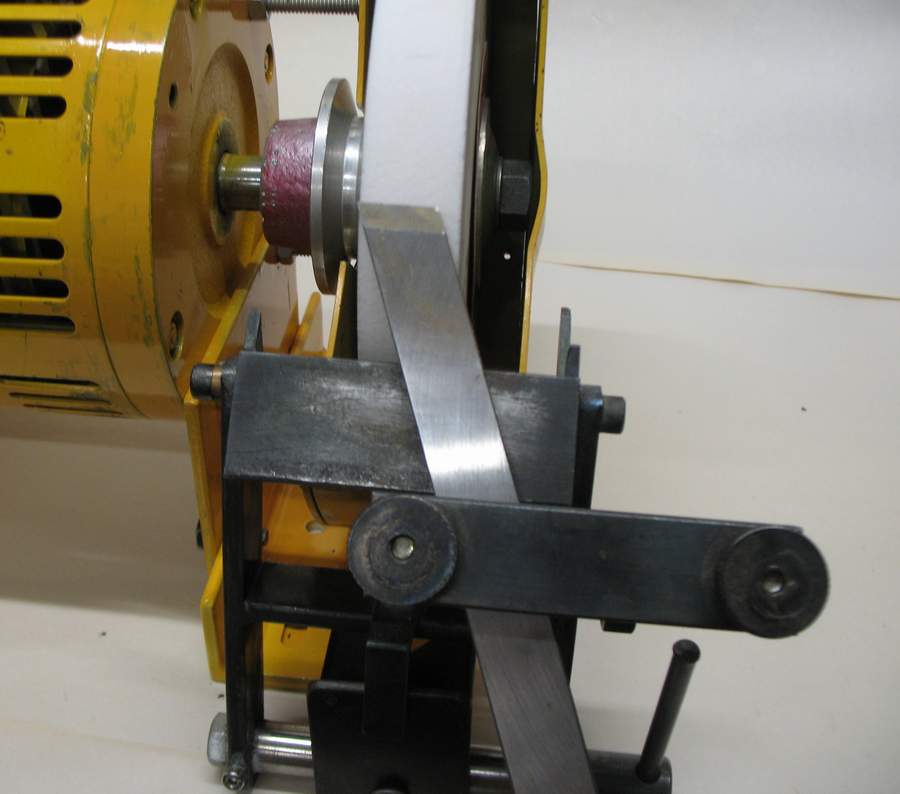
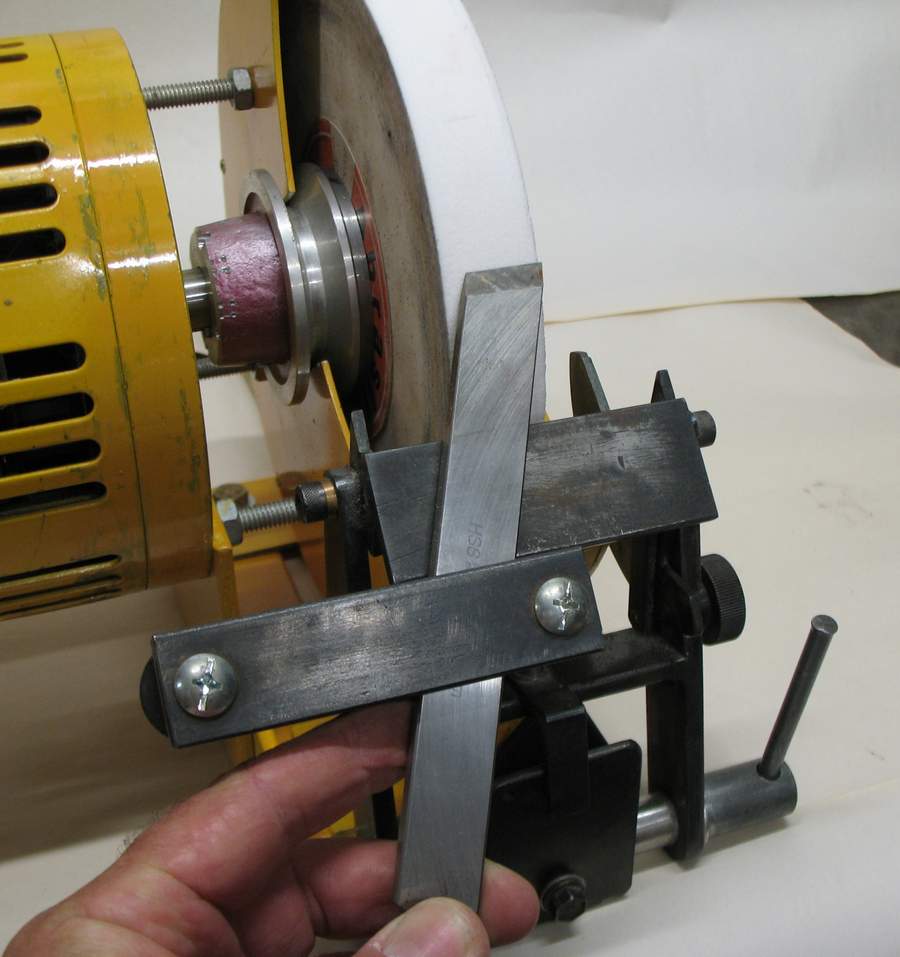
The other setting on the toolrest is a very low angle to suit my very standard Skew chisel. The guide-jig is simply slipped over the end of the chisel, set to the right position with the depth stop and the thumbwheels tightened. |
|
|
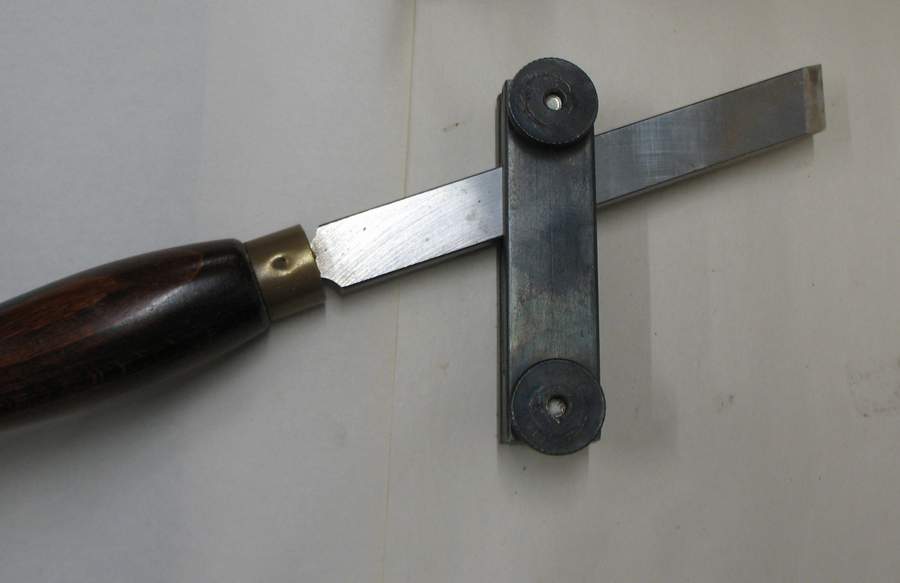
In use, the edge of the jig slides along the front face of the toolrest and both sides of the skew are sharpened without having to move the jig. The same setup could be used on any stable toolrest with it's front edge parallel to the wheel surface.I generally hone the edge of the skew on a diamond file between grinds - usually honing as many times as it takes before the two ends of the concave grind on the bevel blend together. |
|
|
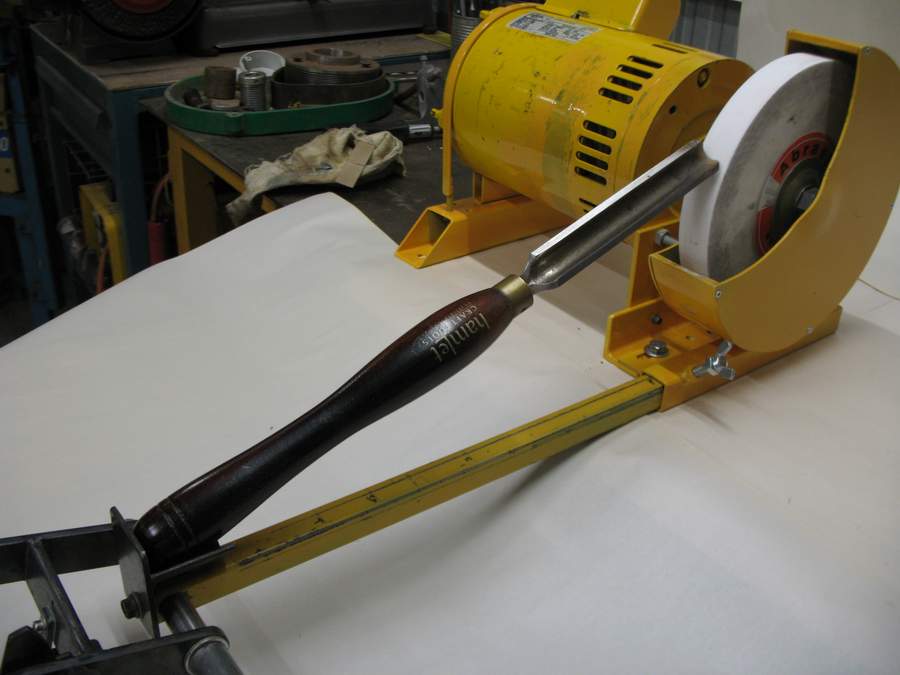
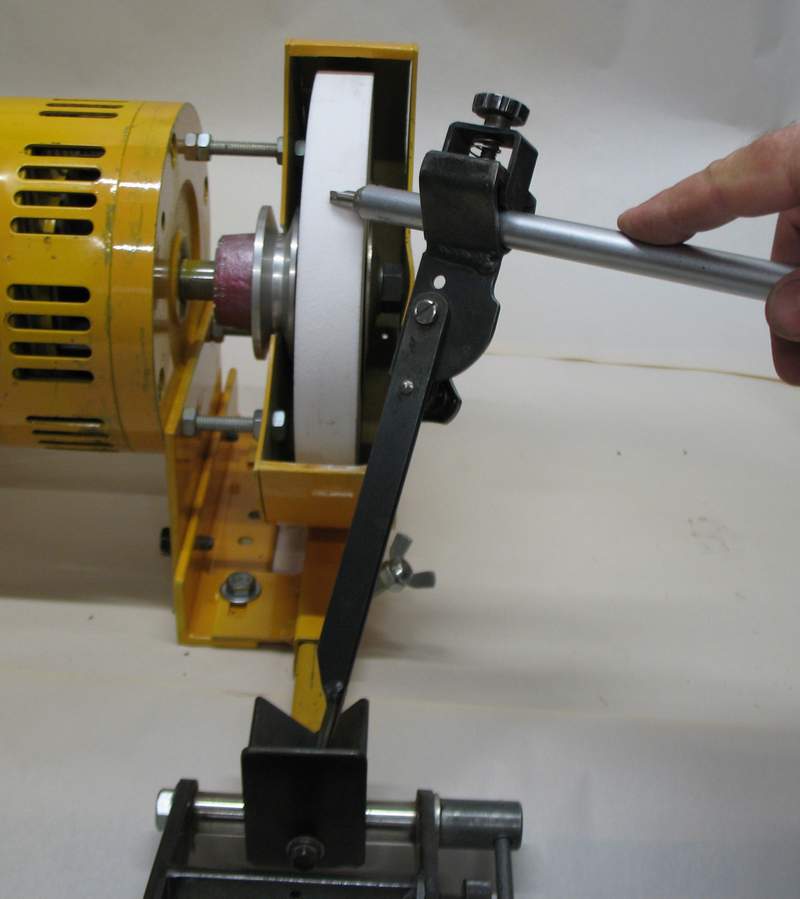
With the toolrest swung down out of the way, the pivot cup is available for my straight ground gouges and my fingernail/long grind jig. I have scribed marks along the length of the sliding bar for each grind. This is a very quick set up to sharpen the spindle roughing gouge. | |
|
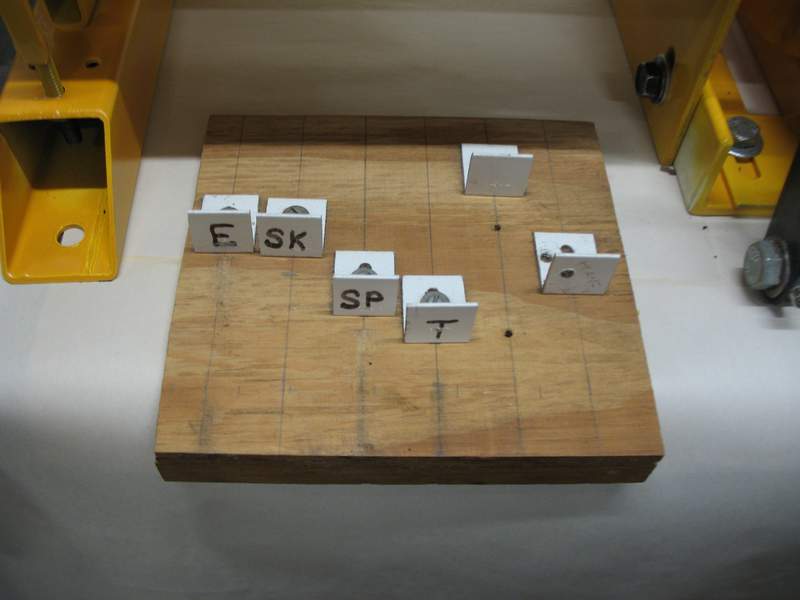
I only have 3 angle settings marked on the fingernail jig - one for the Oland style tools (left), one for an odd 1/2" spindle gouge and the main one I use for all my long ground bowl gouges (at right) as well as my most used spindle gouge. The less settings you use on the jigs, the quicker the changeover from one tool to another and the sooner you get back to the lathe. |

|
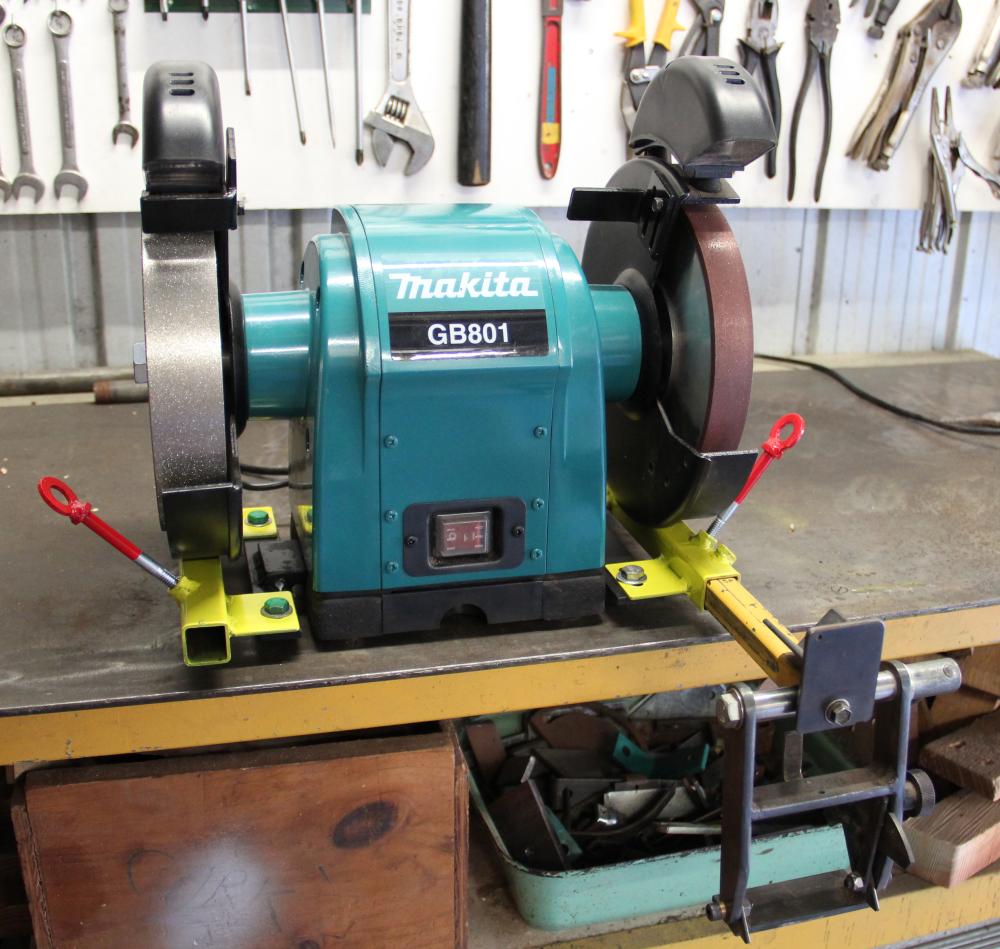
UPDATE: |
|
Modern technology has made the compound abrasive wheel as good as obsolete so I've joined the 21st century with a diamond wheel for sharpening my carbide cutters and putting a fine finish on the tool edges and a CBN wheel for shaping and touching up my HSS turning tools. No more mucking about truing-up, balancing, cleaning or worrying about high speed missiles for this little black duck!Made an extra jig holder so now I can use all my jigs on either wheel and never have to compensate for wheel reduction - paradise! |
|
| Back to Top | ||
| Back to the Gadgets | ||