|
Making a Toothpick Dispenser . . .
or . . .
How to turn a log inside-out!
|
|
I've done this project in 2 parts as you can easily create the
dispenser from a single blank of around 45mm diameter and 120mm or so
long if you wish. If you have a larger blank, just skip to
Part B for the actual
making of the dispenser. In Part A, I have tried to show how smaller
sections can be used to optimise some of the beautiful timbers that get
wasted when they are deemed to small to be of use.
|
|
 |
|
Part A - Turning a log inside out to create a blank . . .
|
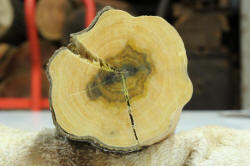
Working with shrubwoods or small trees leaves few options when it comes to
turned objects but this is one way of extending them and showing off the
fantastic colour and grain some of these small timbers hide. Turning
examples like the piece of Purple Bush-pea pictured without some changes
would mean that all you would have to look at would be the rather plain
sapwood with some ugly filler in the huge cracks.
|
|

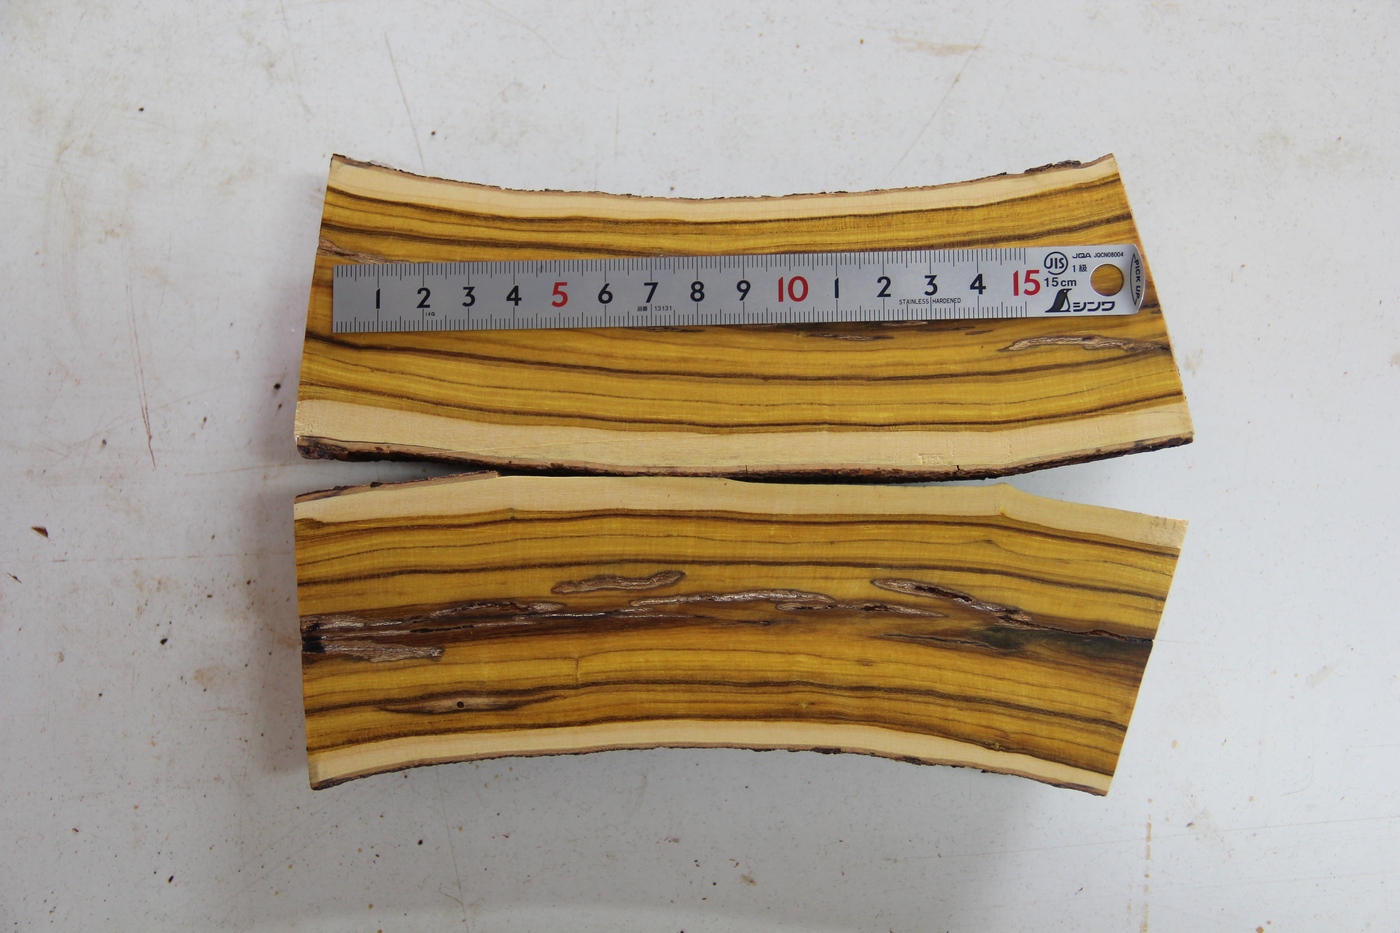
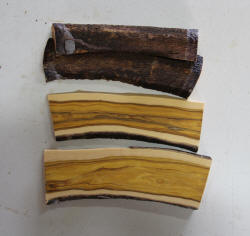
A
far better option is to split/saw the logs along the heart while green
and seal the ends to stop them cracking while they dry - at this point
they are really only useful for pens and knife scales but that's easy
fixed. If they are around 2" diameter, give the halves about one year to
dry.
For the toothpick dispenser the 'slabs' need to be at least 170mm
long.
|
|
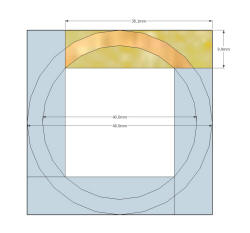
Once dry, slice the slabs to about 12mm thick for this project. A
simple drawing of your cylinders cross section with a square inside and
outside will give you the absolute minimum dimensions you need.
|
|
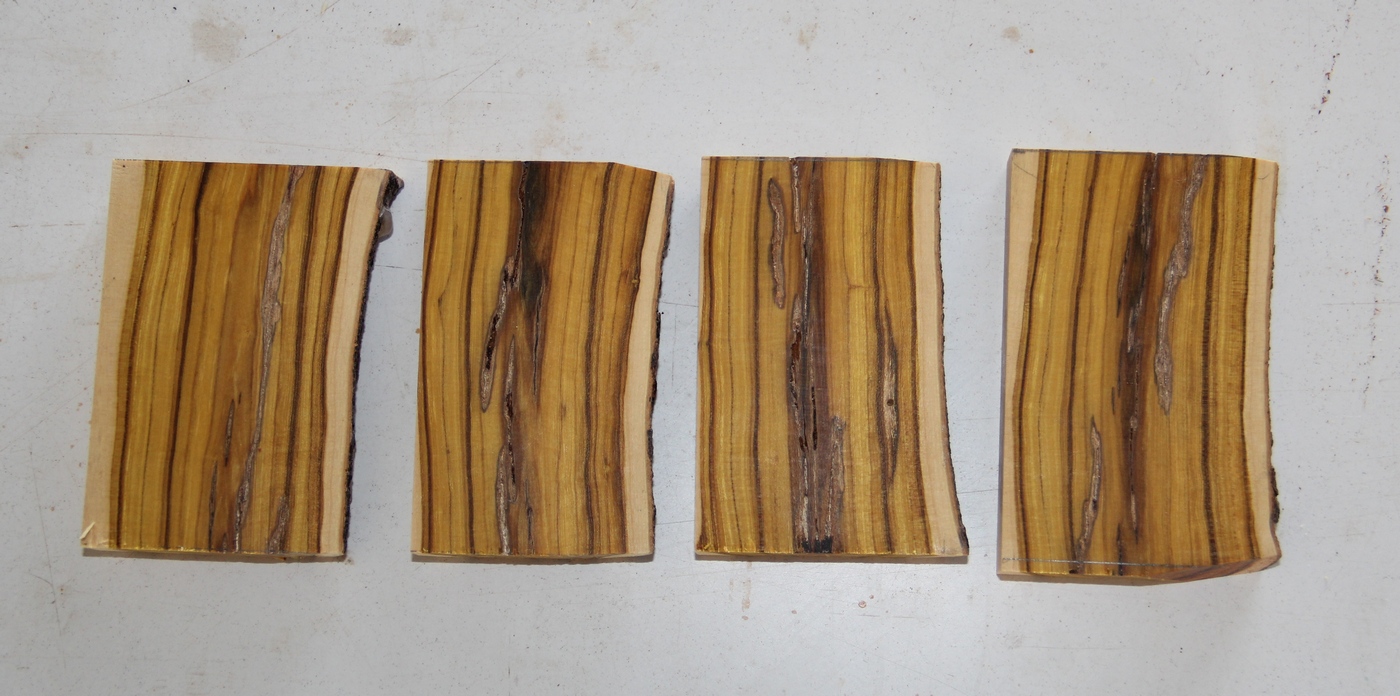
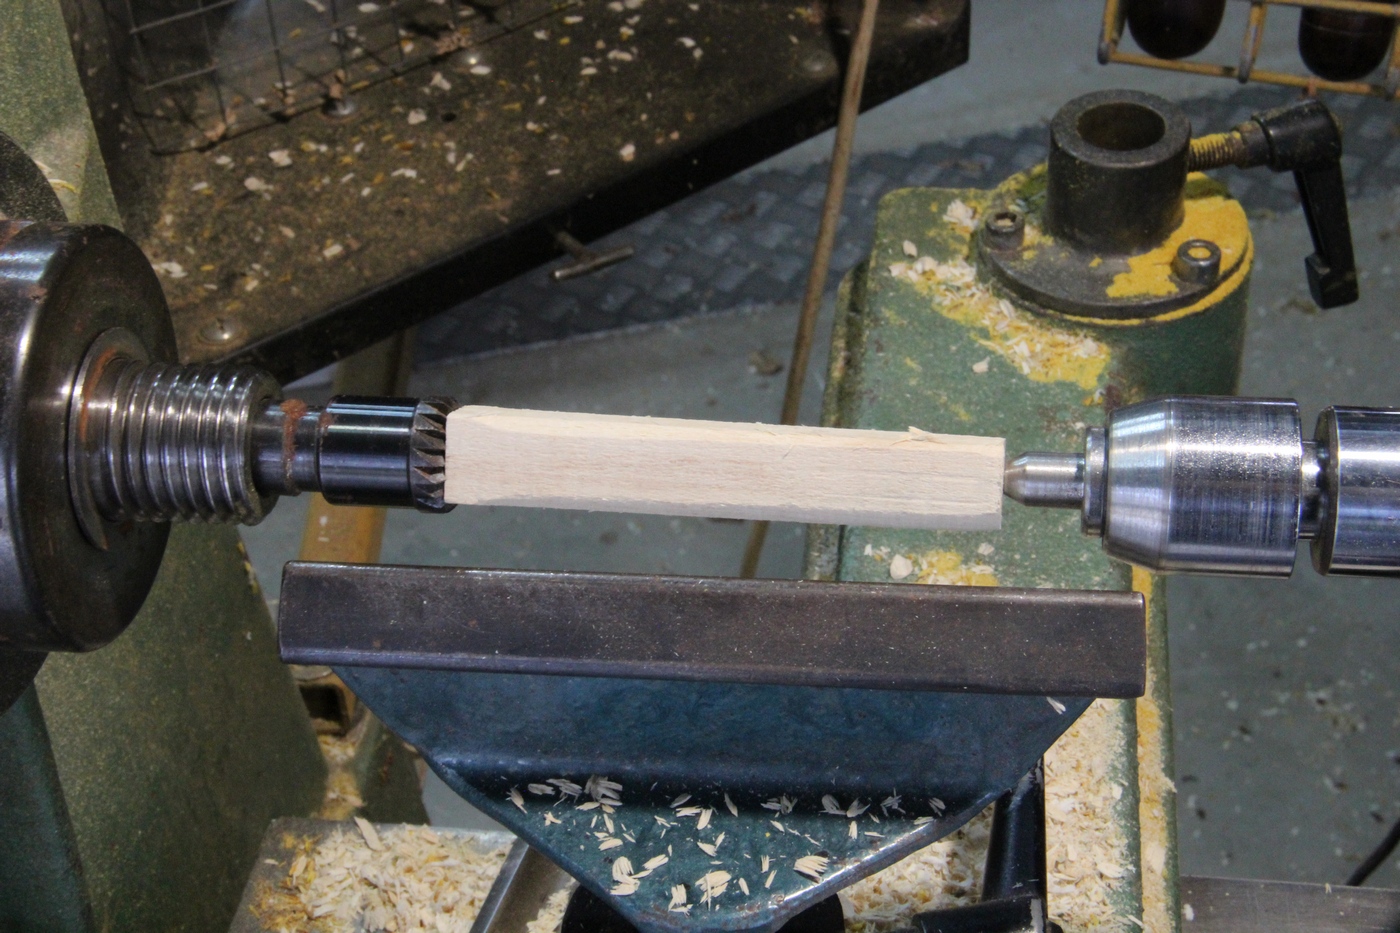
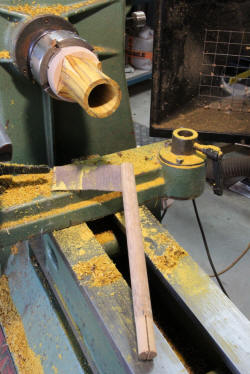
Mark out the best sections roughly square across the slabs and cut
to length - leave an extra 15 mm or more to turn a dovetail spigot on
one end if you can. In this case I only had a 2 or 3 millimetres to play
with and took a different approach to mounting it on the lathe. The
dispenser cylinder is 80mm deep so aim for 100mm long pieces for this
project.
|
|
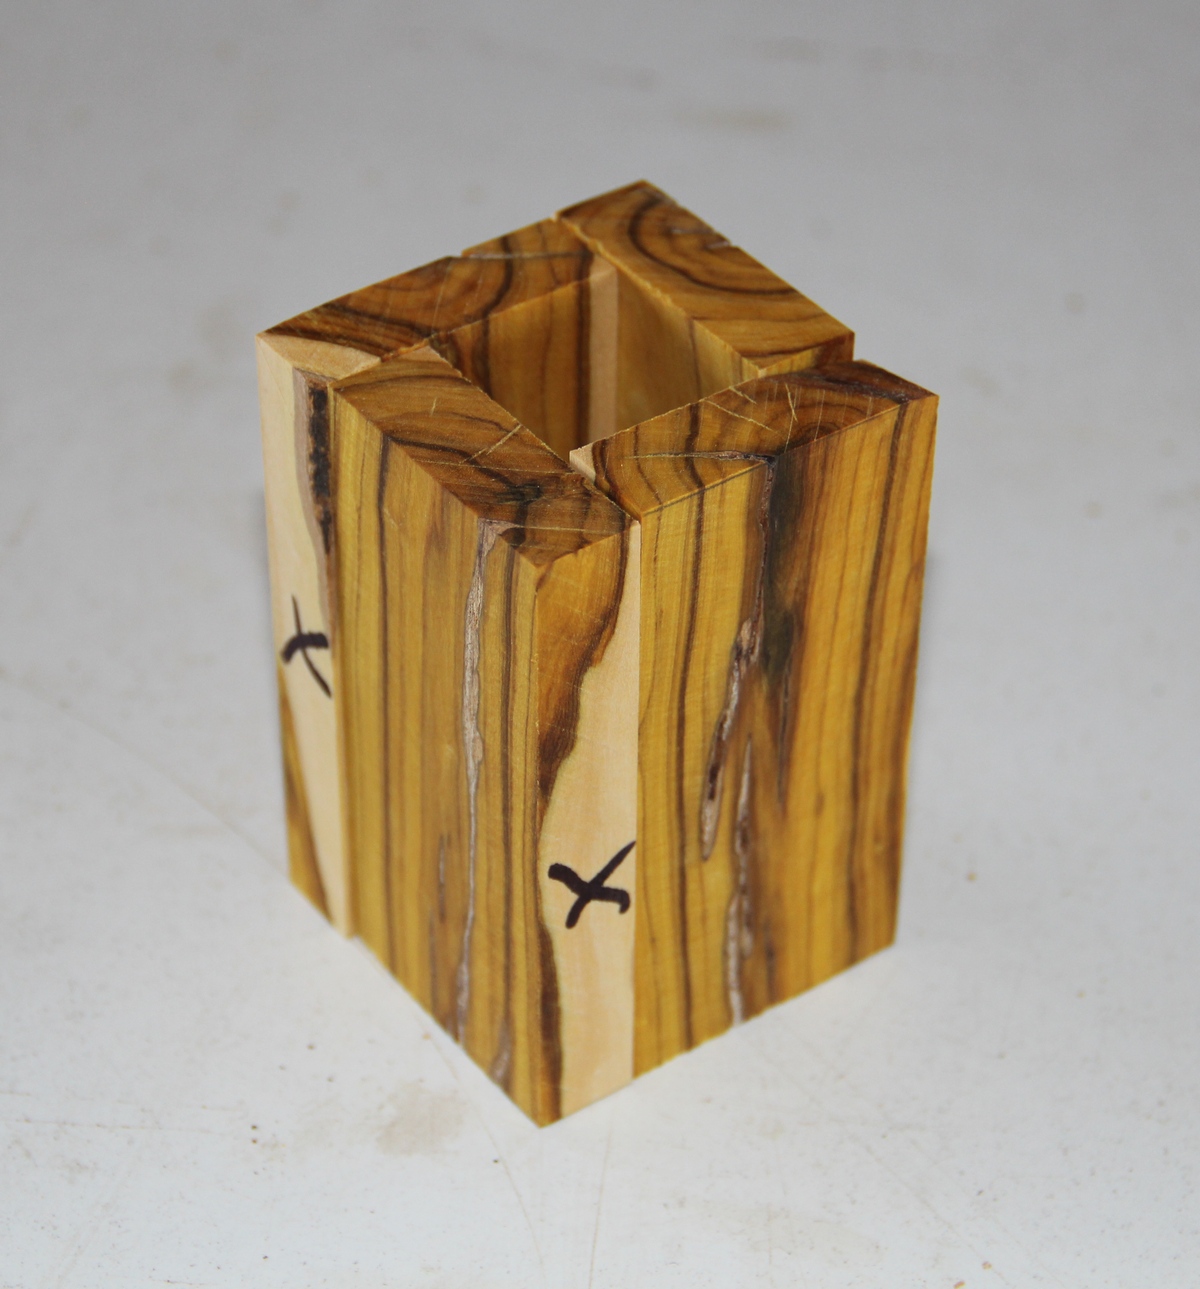
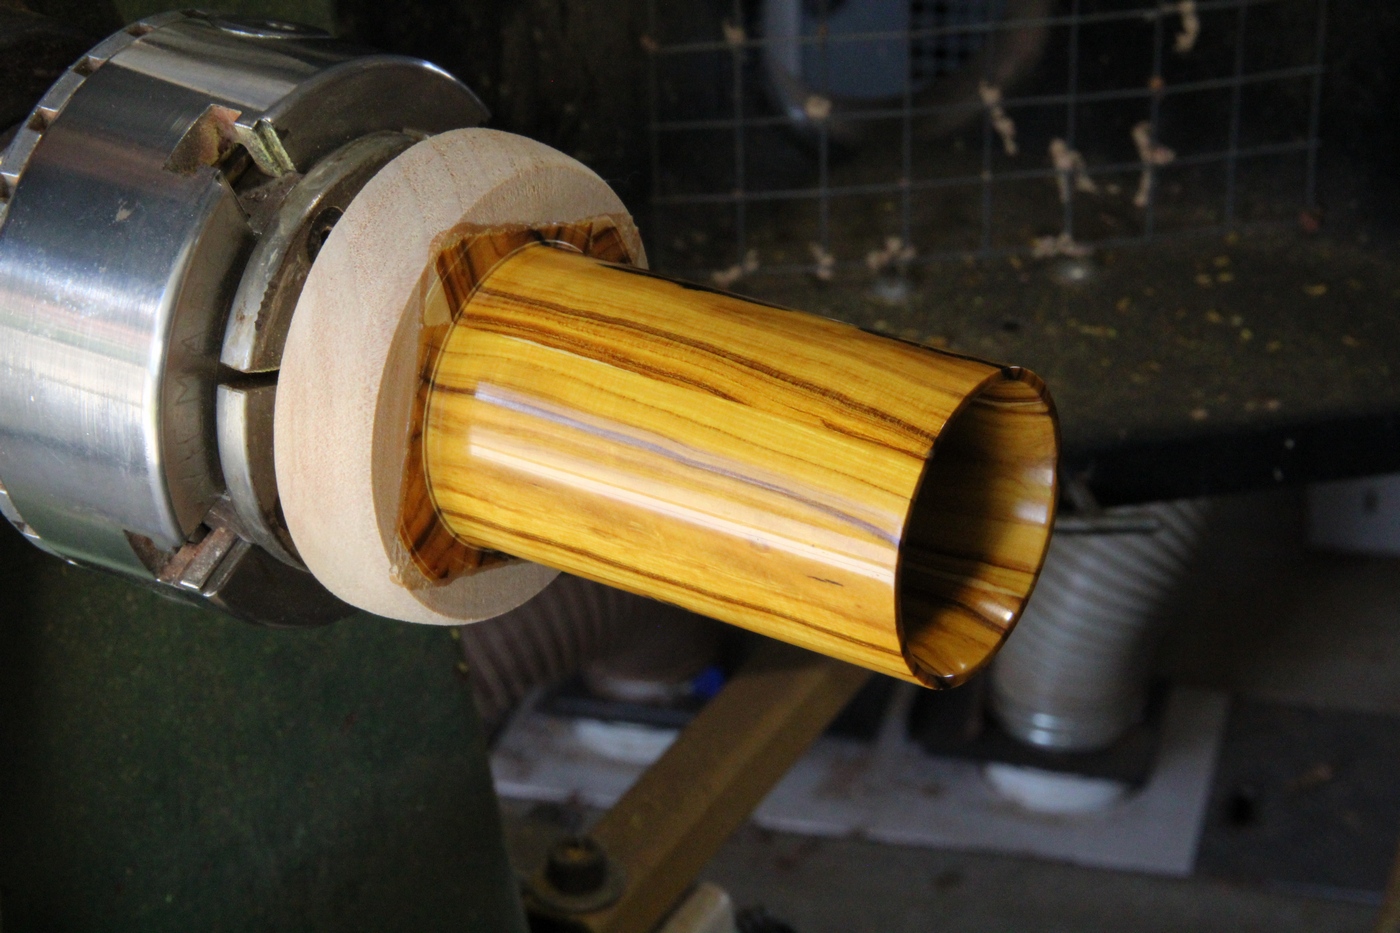
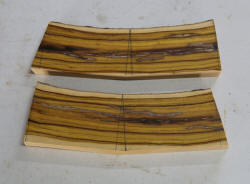
Square up one edge of the slabs and arrange them as pictured with
the heart facing outwards - this is what really shows off the
grain/colour of the heartwood.
If you can find a scrap of square stock the size of the internal
space ,it will make setting up and gluing easier but is not essential.
|
|

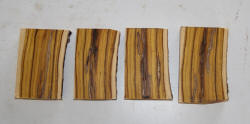
Mark where the excess on each slab can be removed and trim it off to
make clamping easier.
|
|
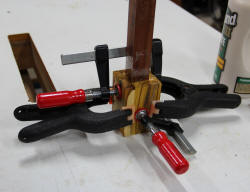
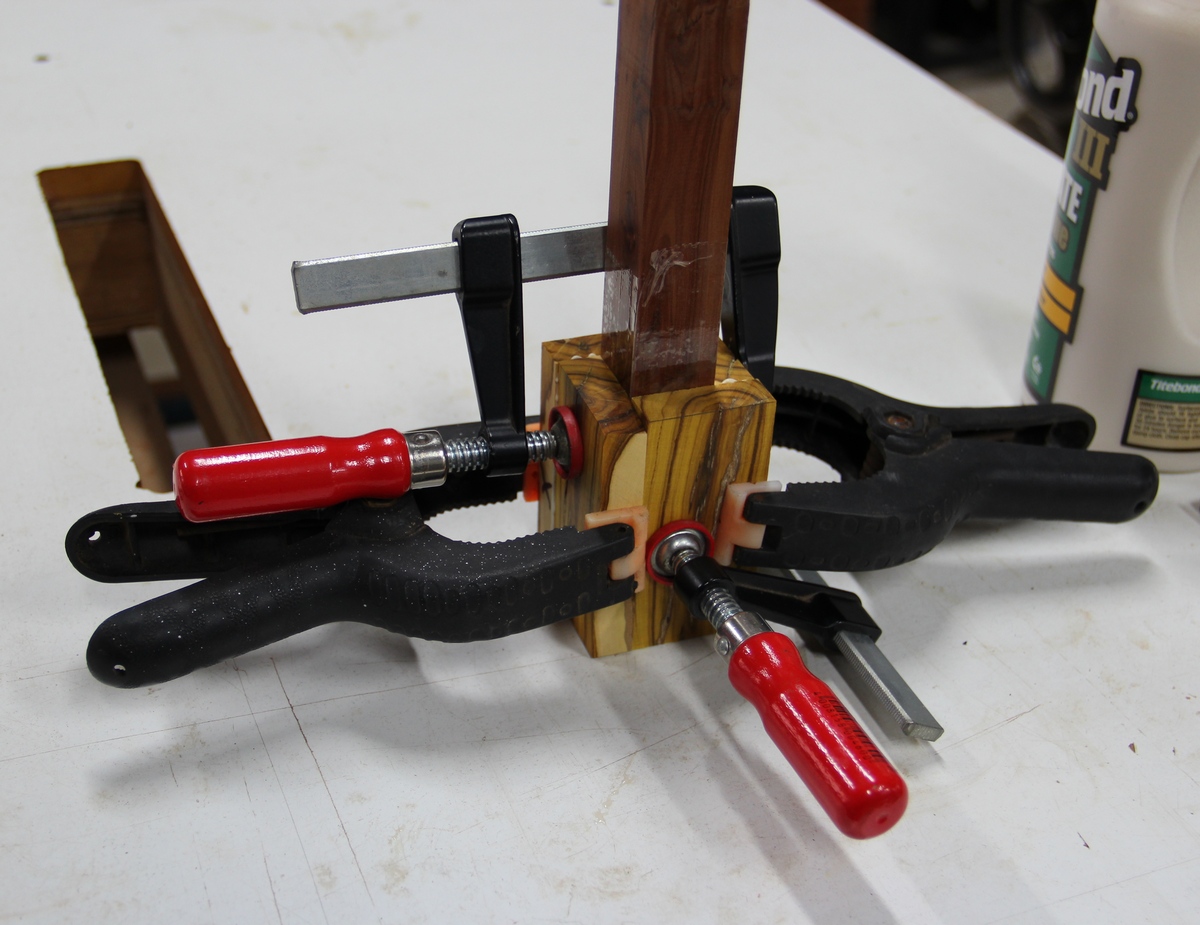
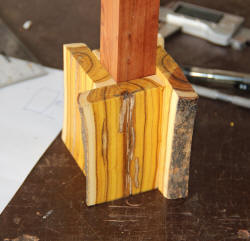
I only glue two opposite corners to begin with - trying to glue all
four at once requires too many clamps for such a small space.
A bit of packing tape over the square packer will stop the glue from
grabbing it.
|
|
|

Once the first corners are dry, the next two are very easy to clamp
up. I use Titebond III for my glue-ups, mainly for the working time it
gives me, but also because it is supposed to be a stronger bond.
|
|
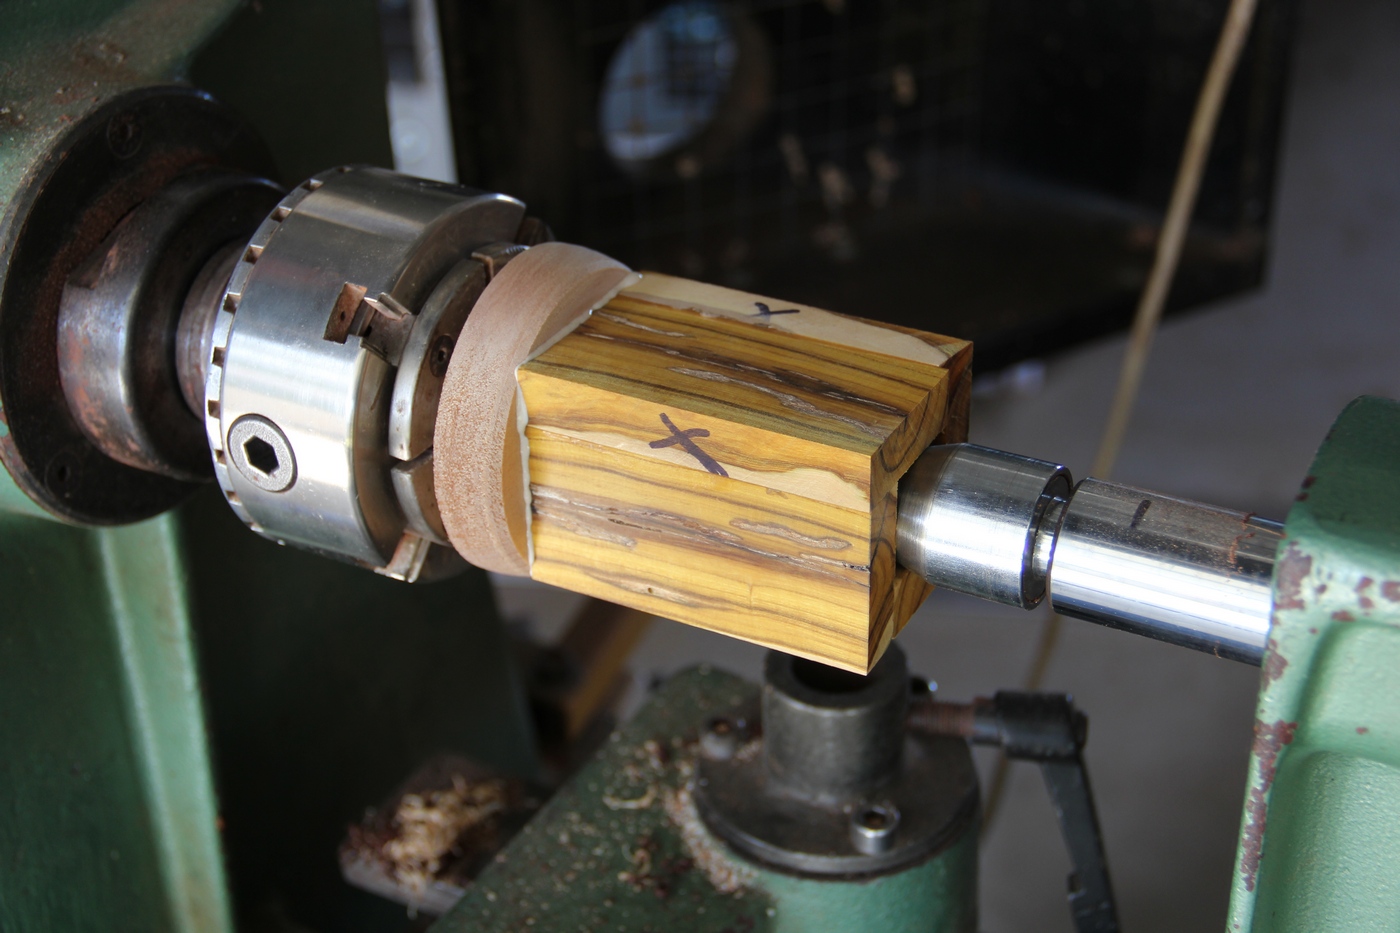
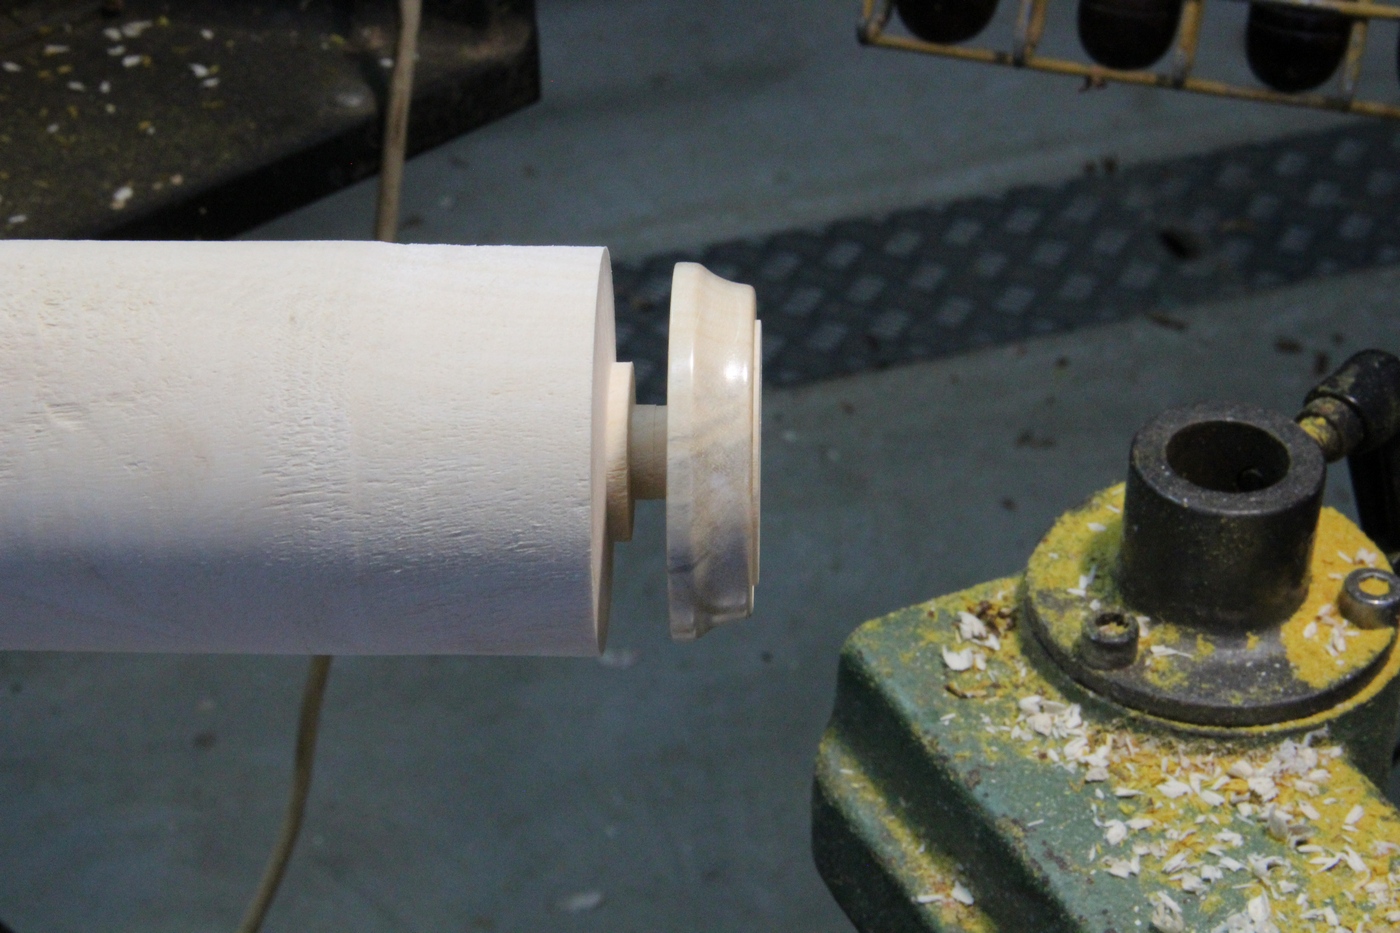
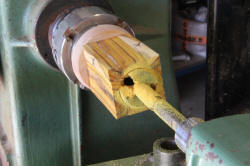
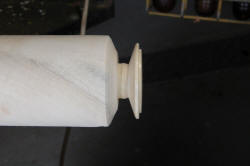
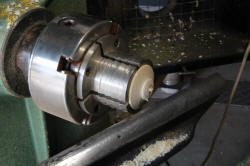
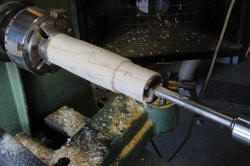
 Once
the glue dries, you have a few options for mounting the blank on the
lathe. Here I glued it on to an old jam chuck as it simply wasn't long
enough for any other method, and used a cone on the tailstock to centre
the blank. Once
the glue dries, you have a few options for mounting the blank on the
lathe. Here I glued it on to an old jam chuck as it simply wasn't long
enough for any other method, and used a cone on the tailstock to centre
the blank.
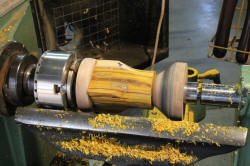
If you have the length, the easiest method is to very carefully
mount one end in the jaws of your chuck, then turn a dovetail spigot on
the other end to mount it by more securely.
|
|
|
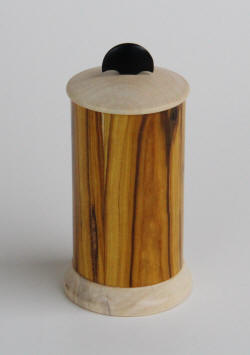
Part B - Making the dispenser . . .
|
|

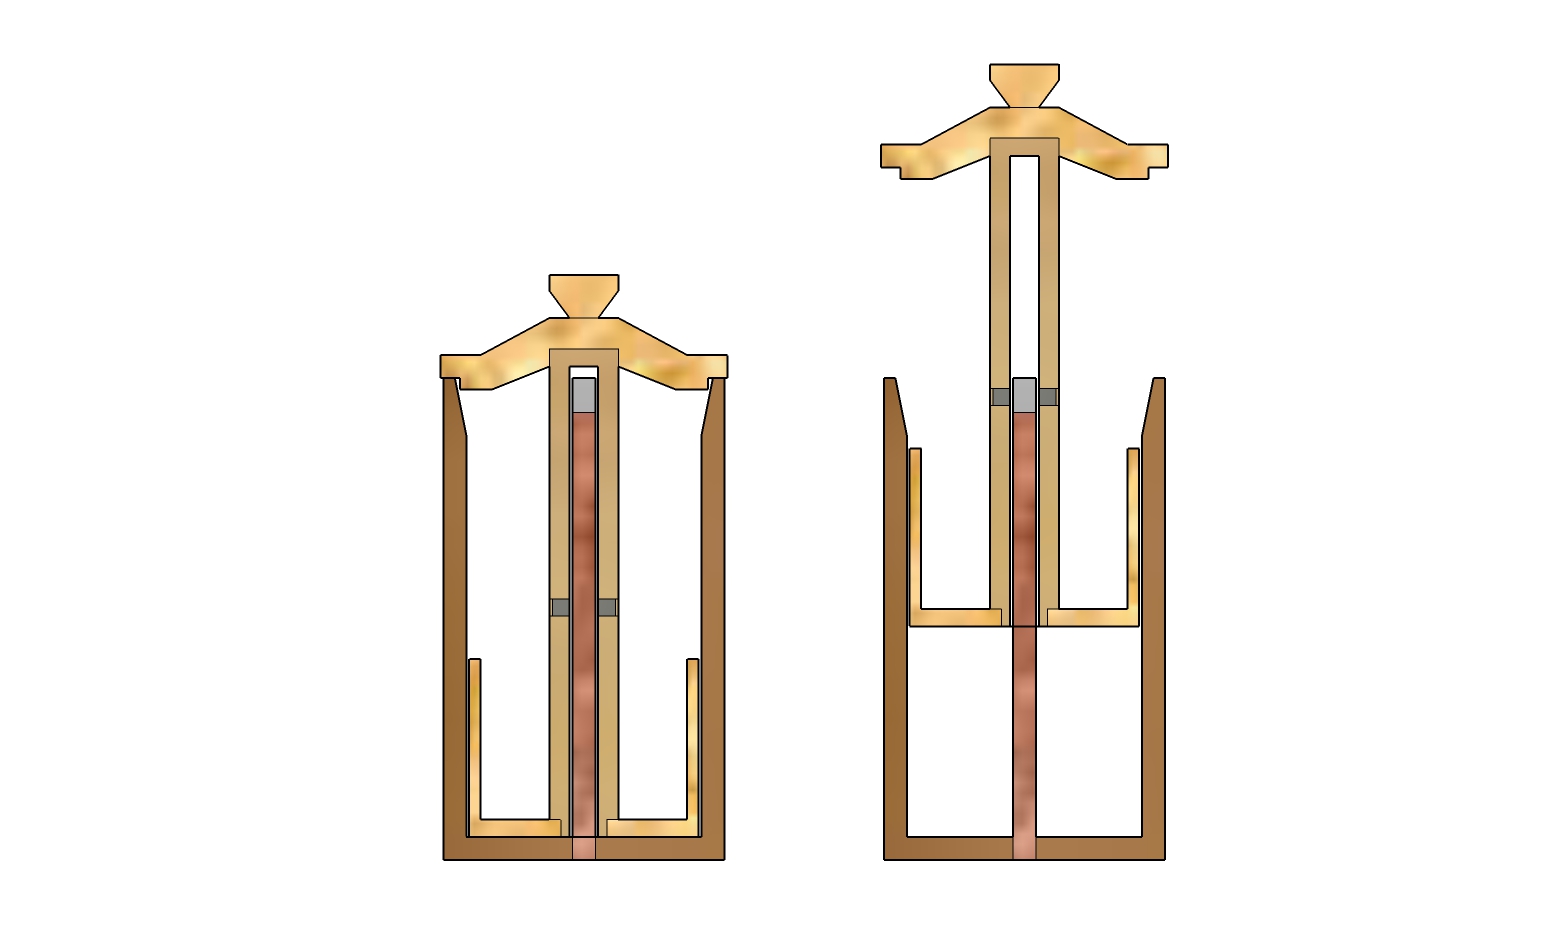
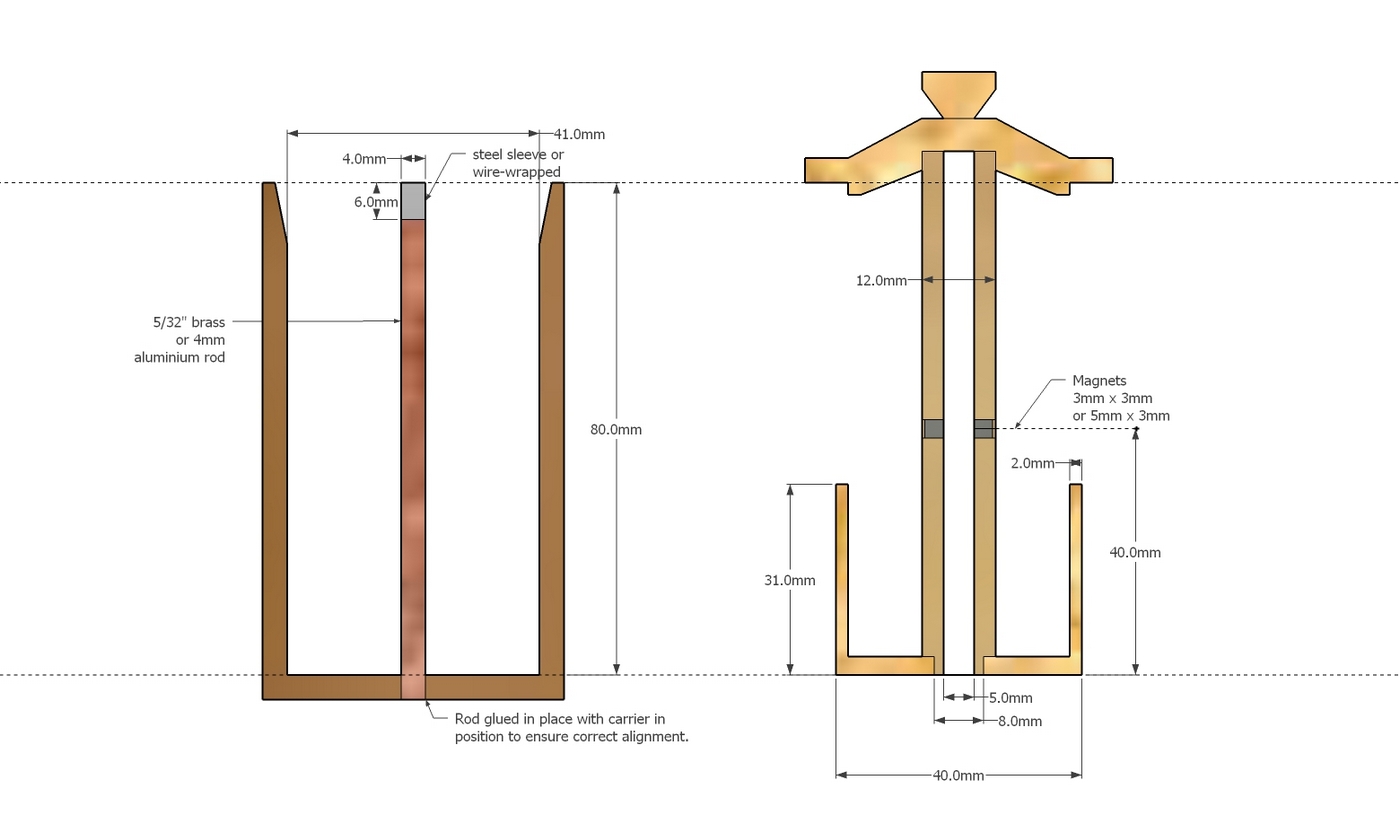
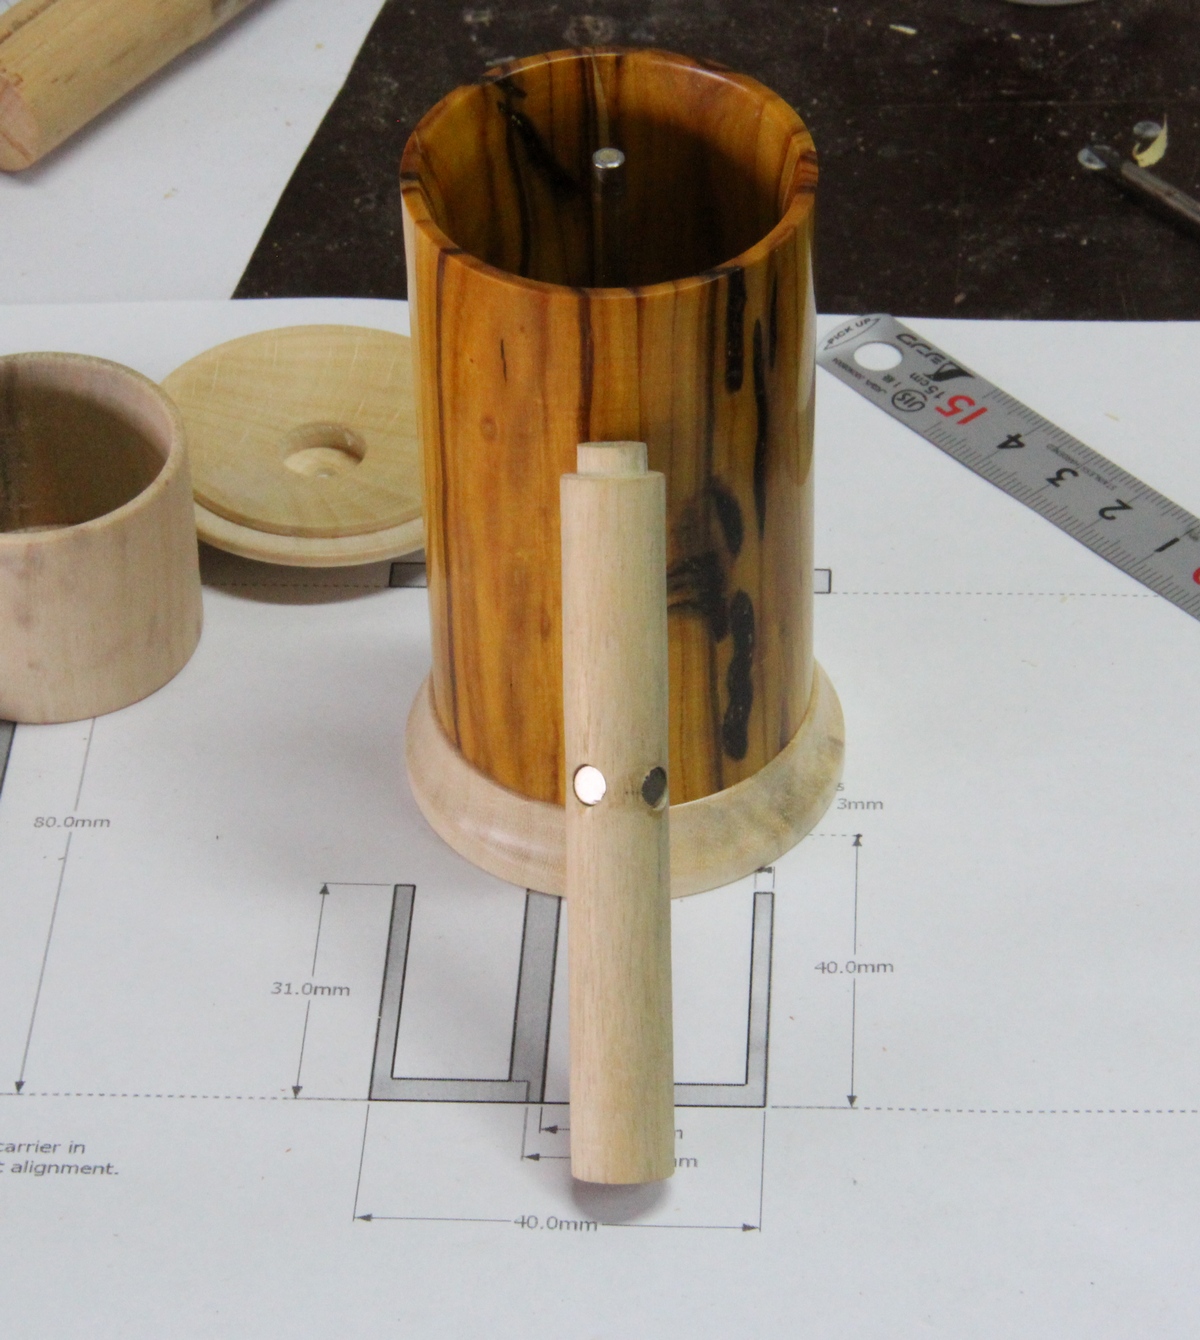
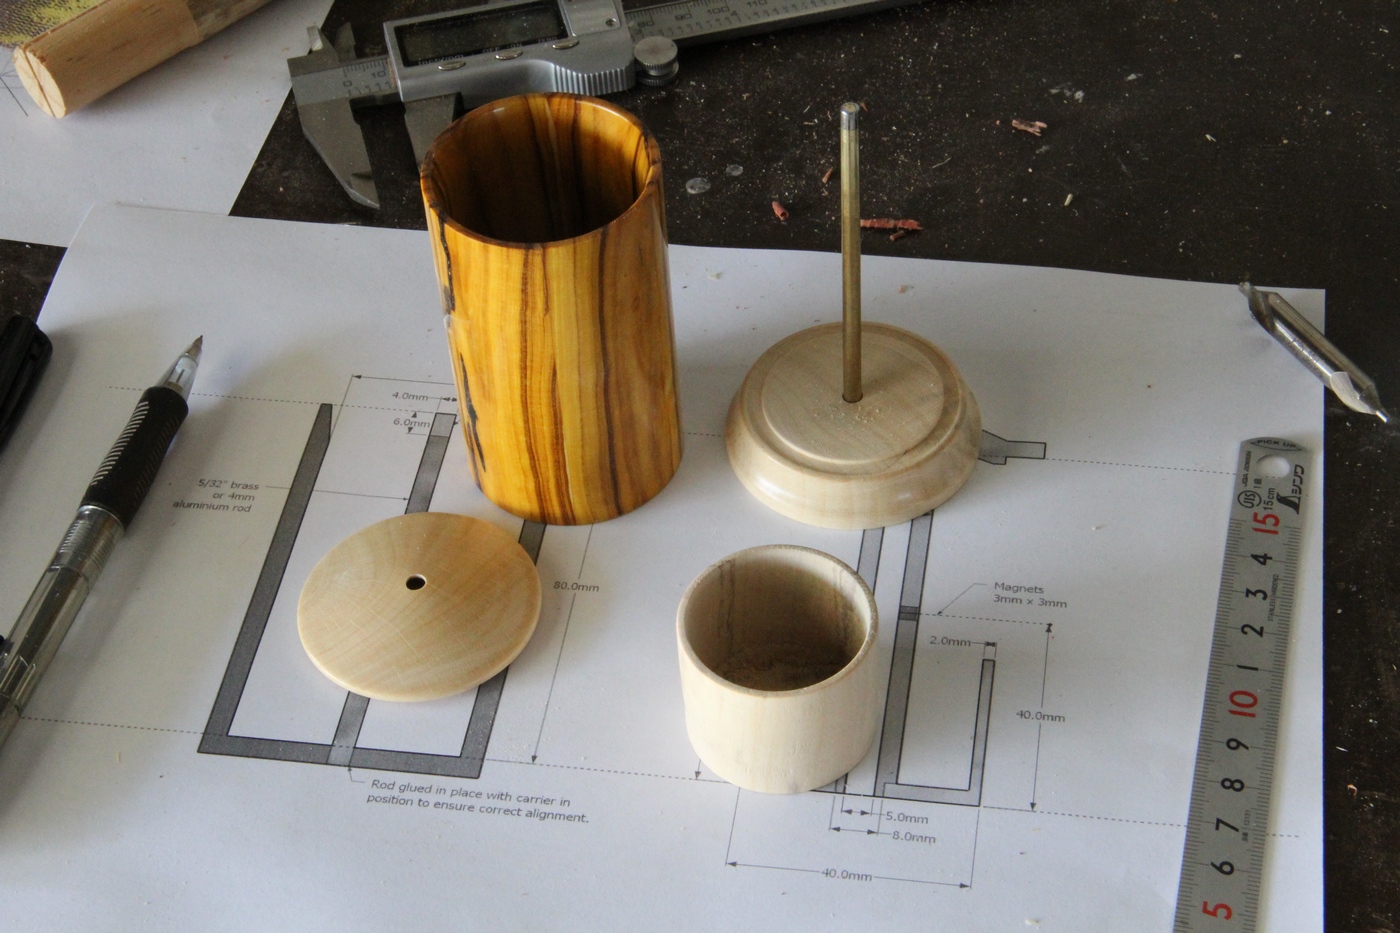
These drawings give the basic dimensions for the dispenser but I
think making a separate base looks better and helps add a little weight
to it. The key to success with this project is getting the weight of
each
component just right so it operates the way it is supposed to.
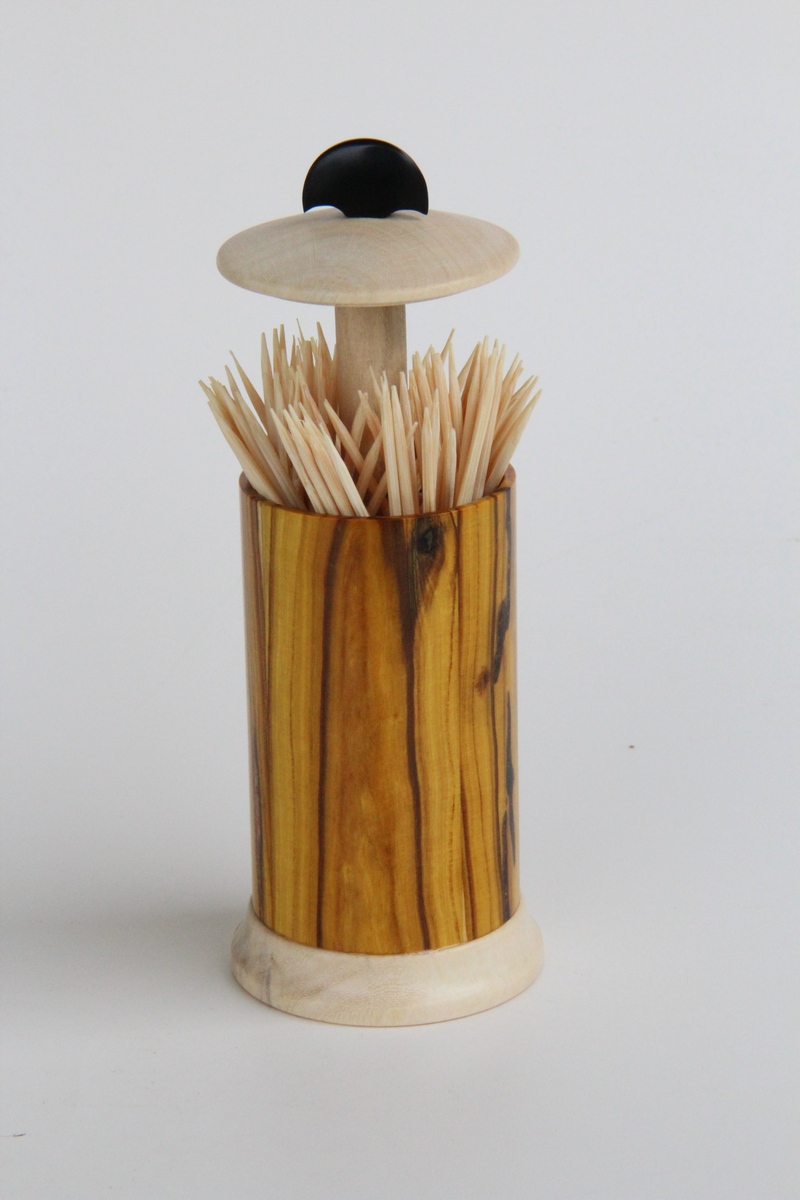
The main idea was for the dispenser to be one-handed in use - no
need to pick the dispenser up and shake aimlessly till something falls
out!  Lift the lid with one hand, grab a toothpick, then tap the lid for it to
close gently on a cushion of air. The base should stay put when you lift the lid, and once
the carrier is raised enough for the magnets to attach to the centre
shaft, any further lifting should lift the base as well. This way you
would have to intentionally hold the base down to remove the carrier for
refilling etc and avoid too many unwanted spills.
Lift the lid with one hand, grab a toothpick, then tap the lid for it to
close gently on a cushion of air. The base should stay put when you lift the lid, and once
the carrier is raised enough for the magnets to attach to the centre
shaft, any further lifting should lift the base as well. This way you
would have to intentionally hold the base down to remove the carrier for
refilling etc and avoid too many unwanted spills.
|
|

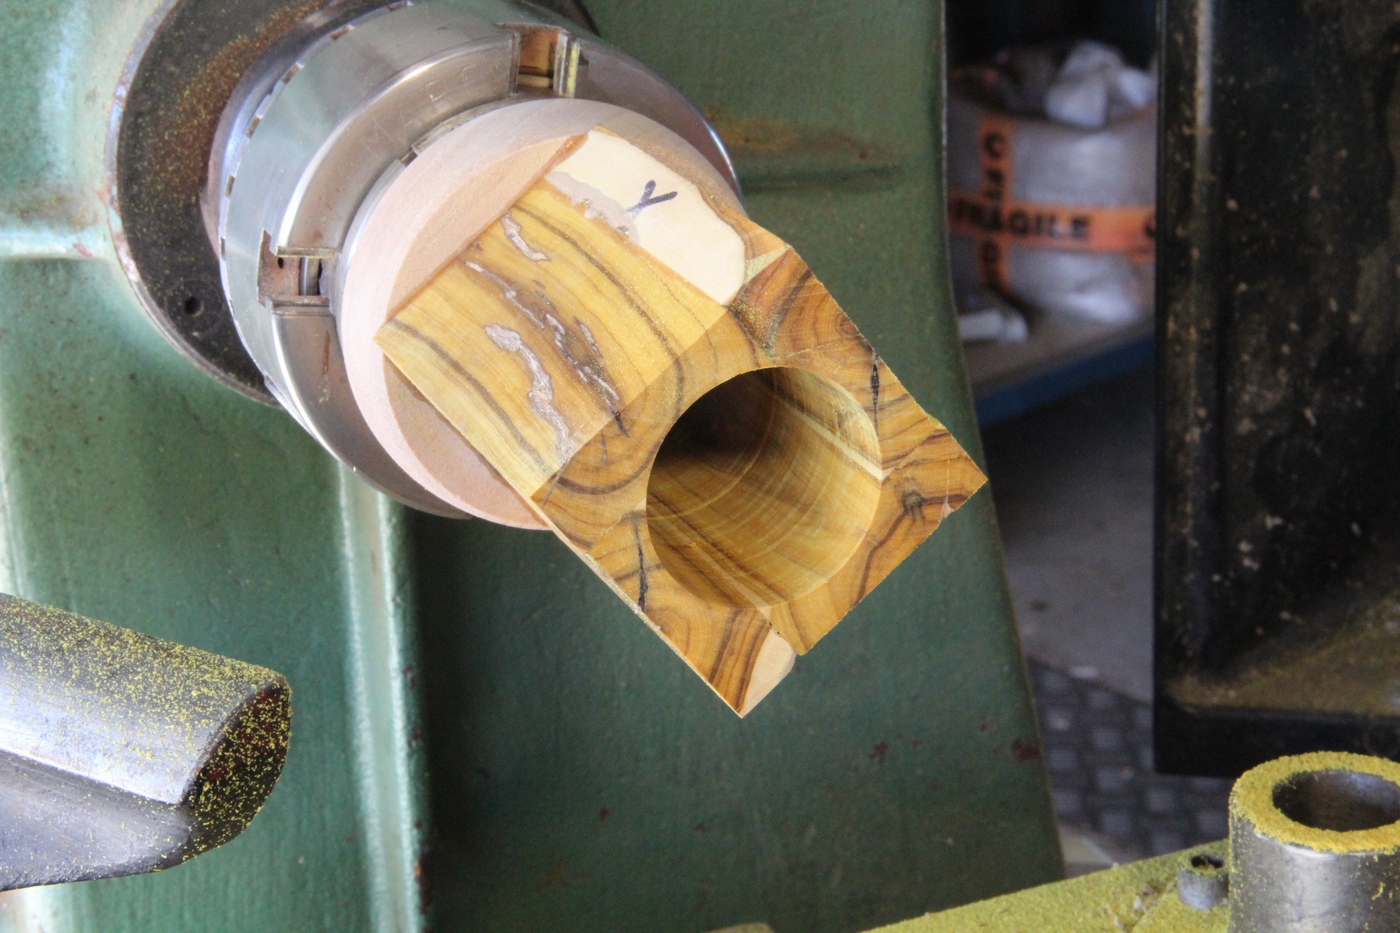
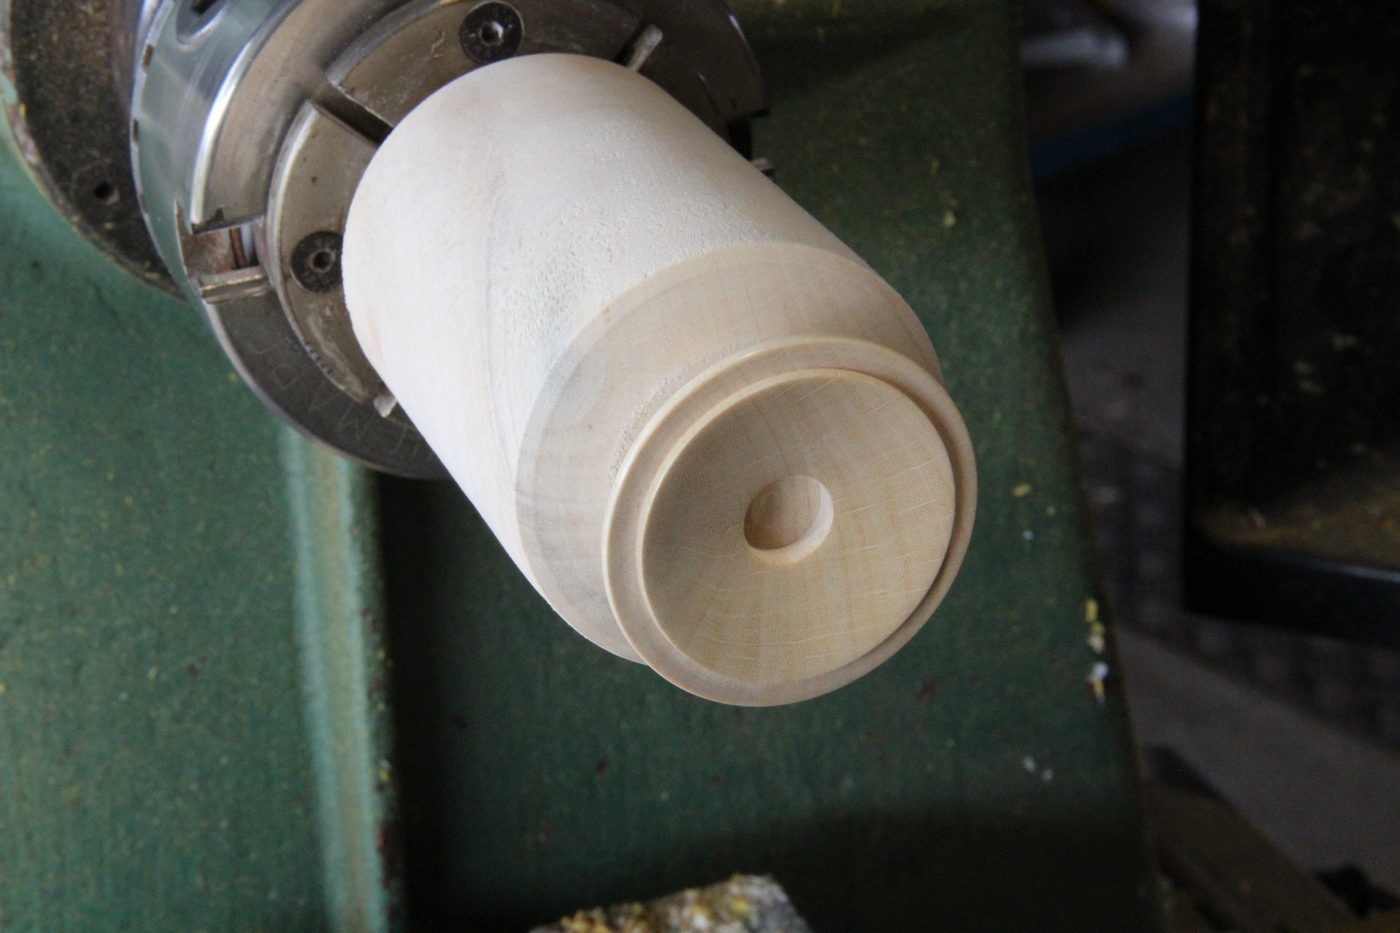
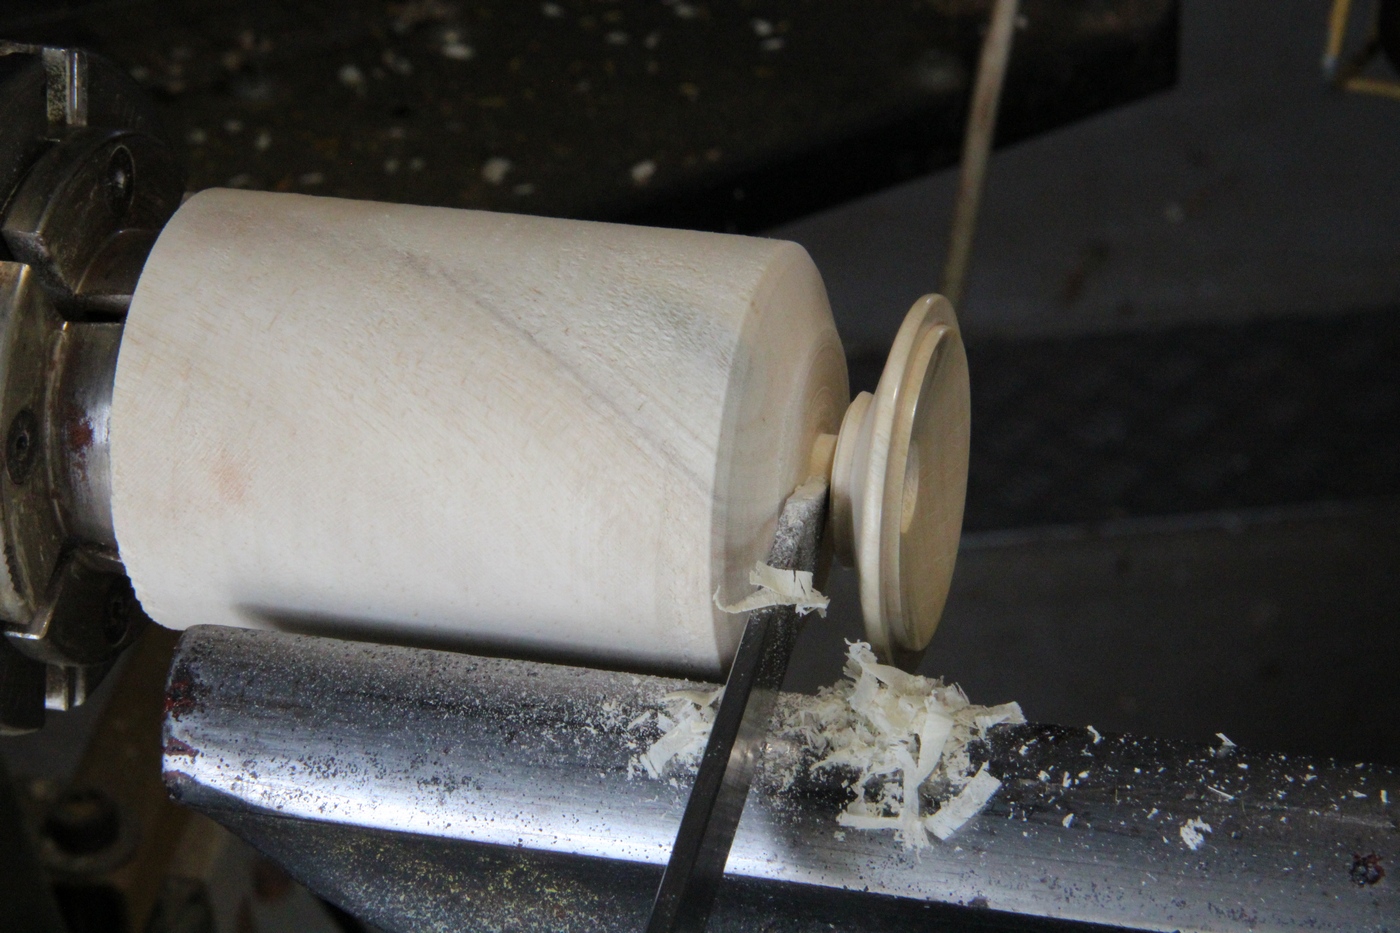
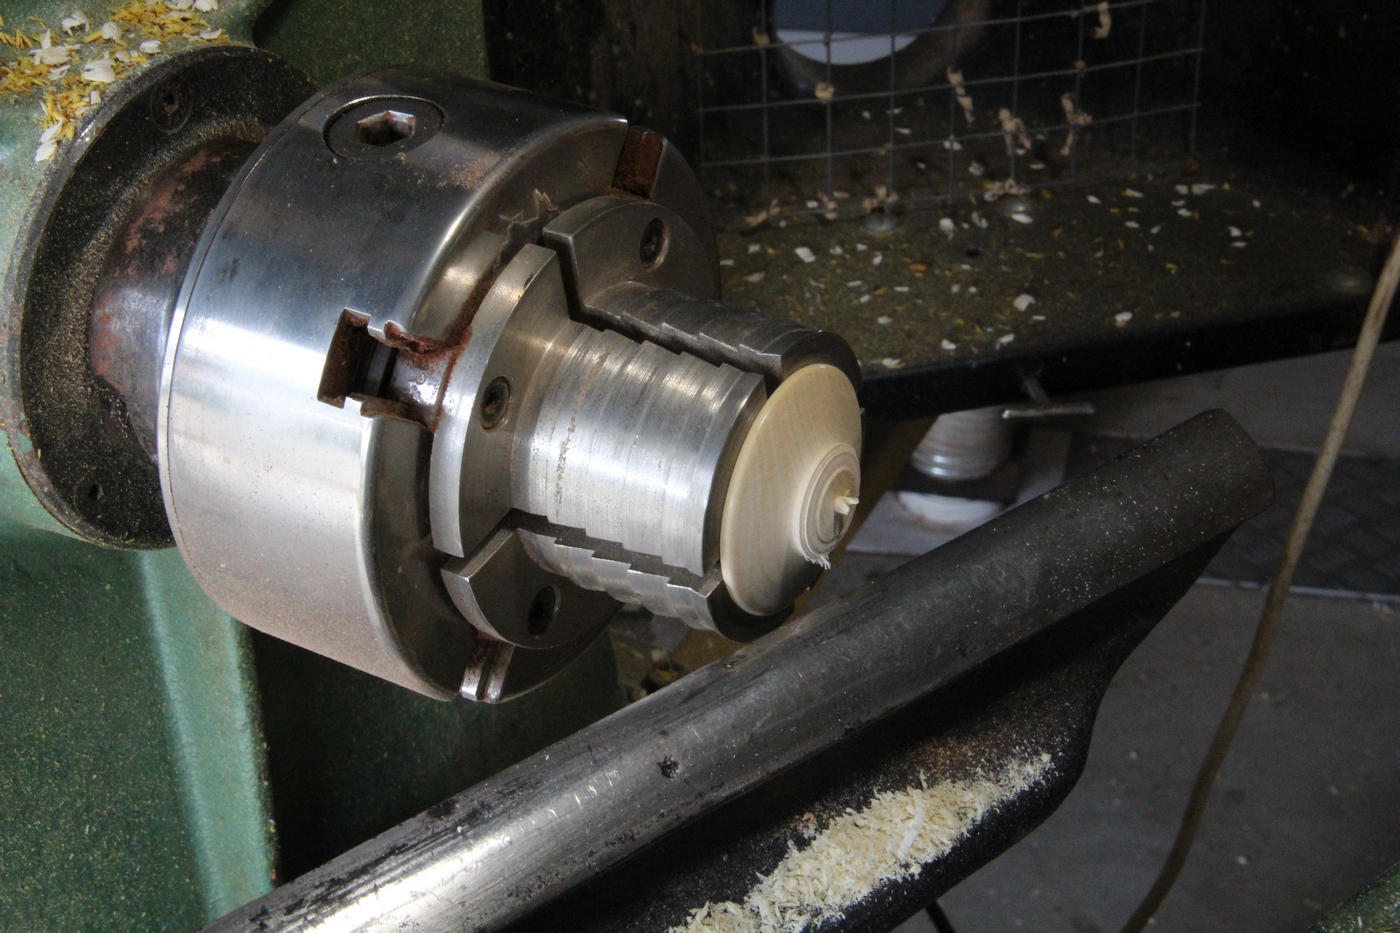
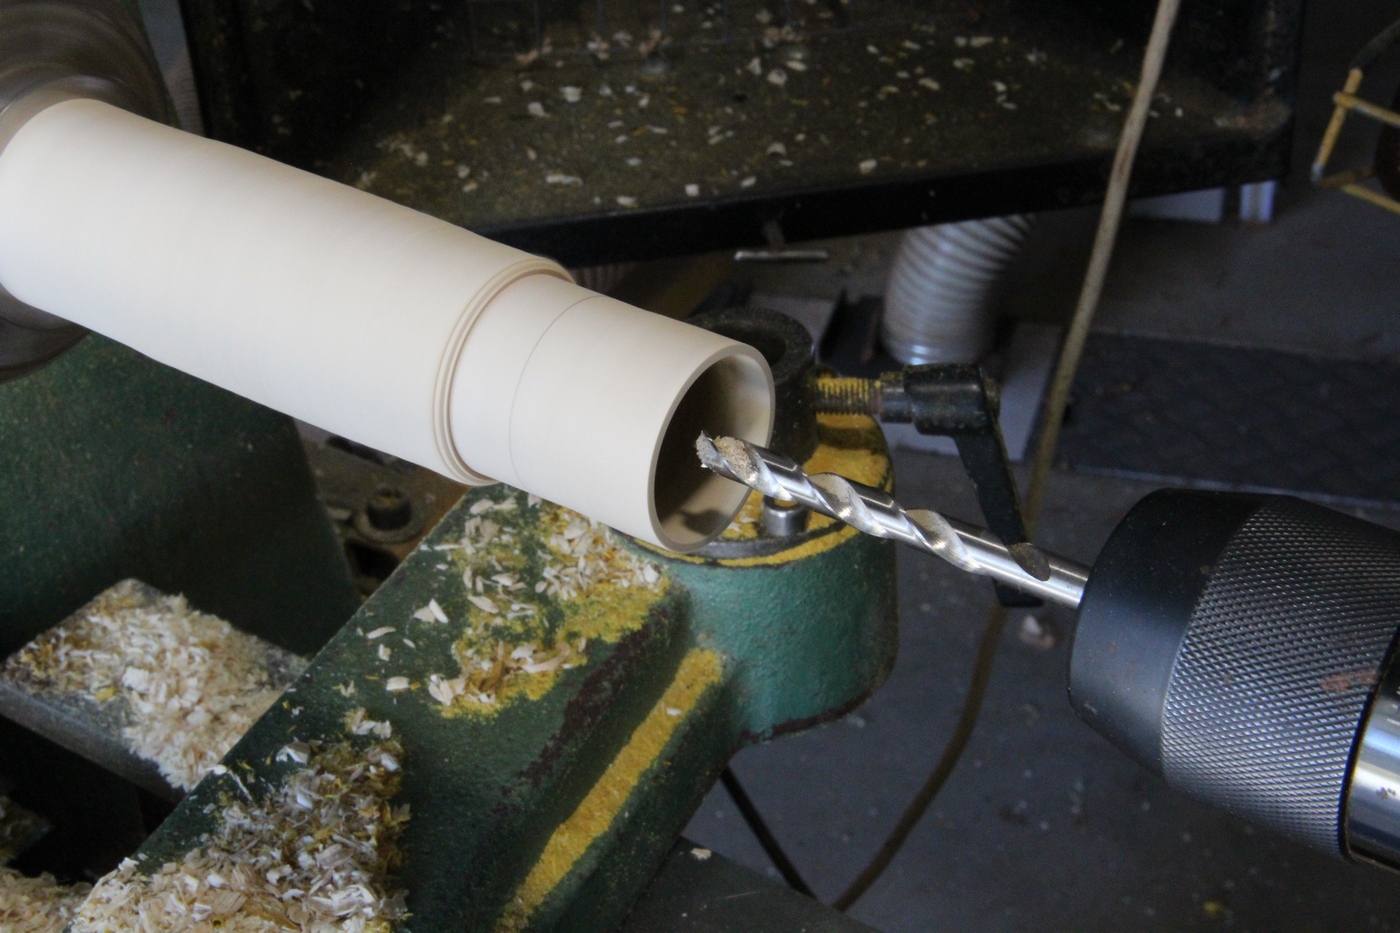
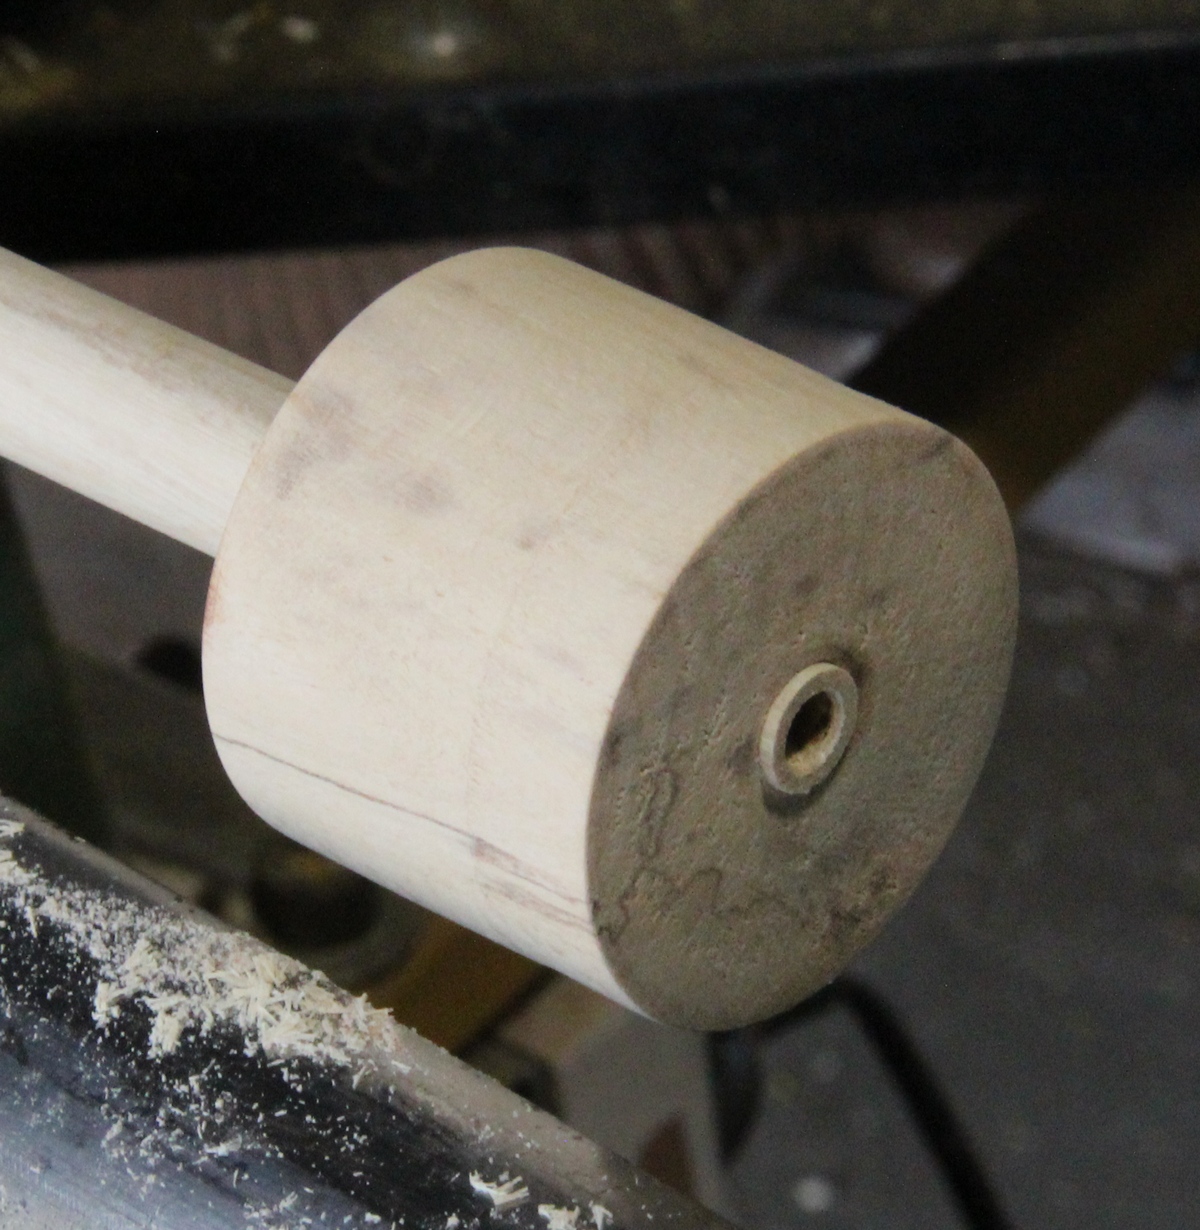
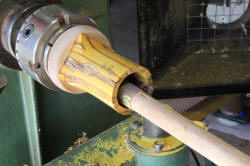
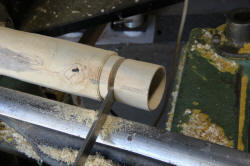
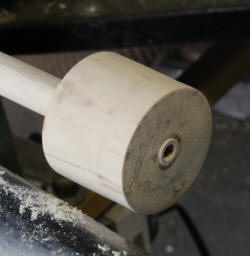
With the blank securely mounted on the lathe, square off the end and
drill/turn the inside to just over 40mm diameter.
|
|
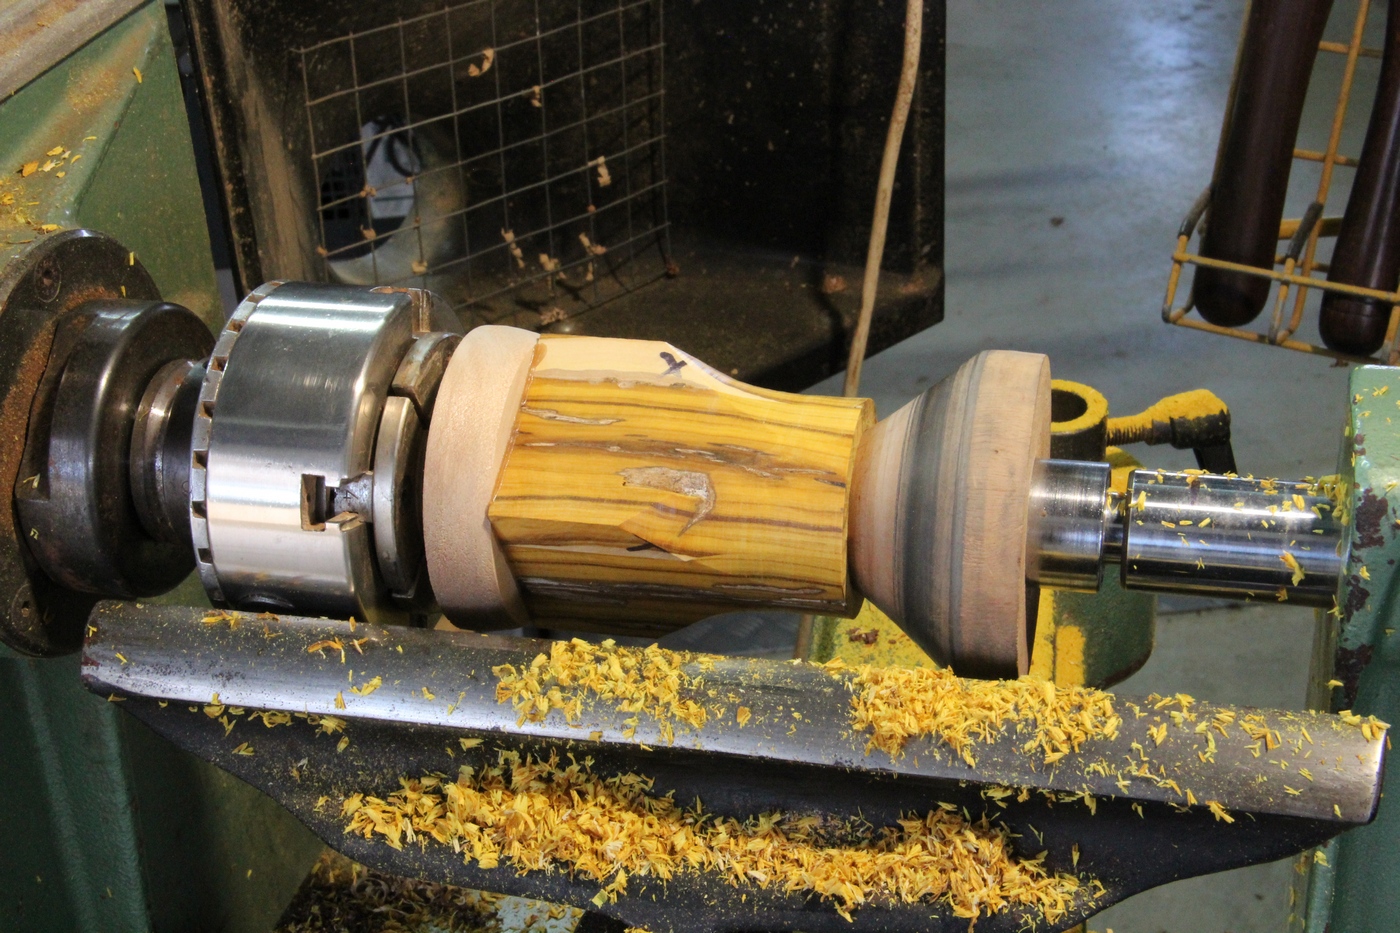
Turn the cylinder down to leave a wall of 3 to 4mm. Fill any voids
at this point, particularly on the upper half of the inside if there are
any - if the toothpicks lodge in a hole there they will jam and stop the
dispenser from opening properly. (Don't ask me how I know this!)
|
|
A length of dowel (broom handle!) with a slot sawn in one end
makes a brilliant sander for the insides of the cylinder, particularly
if you're using Abranet.
|
|


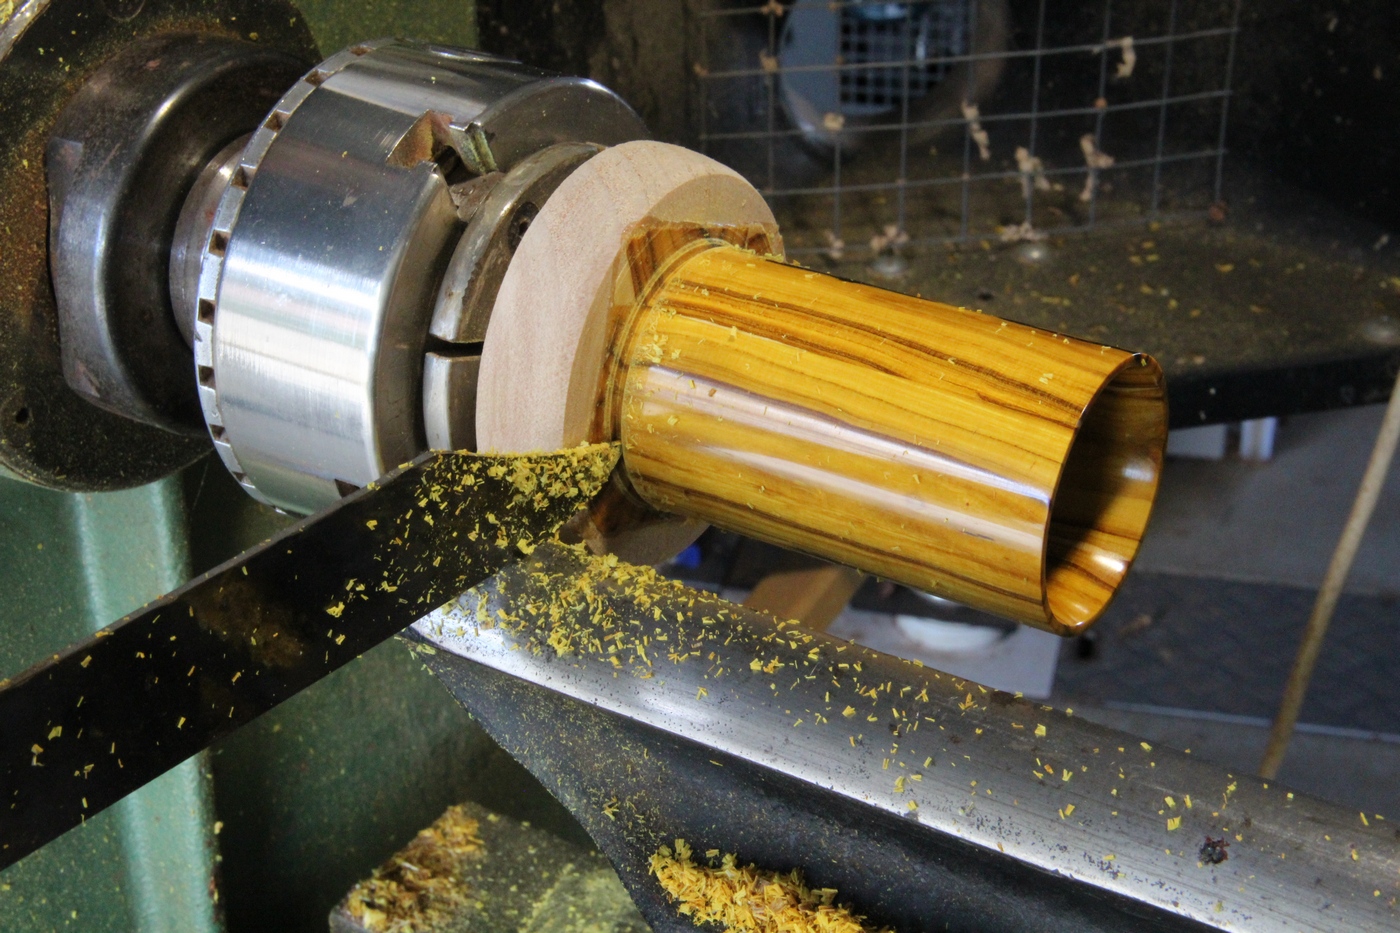
Don't forget to taper the inside edge a little to let the toothpicks
lay out further, then sand and finish before parting the cylinder off
(and catching it of course!)
|
|

With the cylinder complete, all other parts can be tuned to fit it's
dimensions if it didn't quite go to plan.
|
|
 A shallow recess in the base to fit the cylinder helps line
everything up and don't forget to drill a hole to suit your centre
shafts diameter
A shallow recess in the base to fit the cylinder helps line
everything up and don't forget to drill a hole to suit your centre
shafts diameter . .
Sand, finish and part the base off your blank. You can
of course make the cylinder and base from one piece if you like and
ignore some of these steps.
|
|

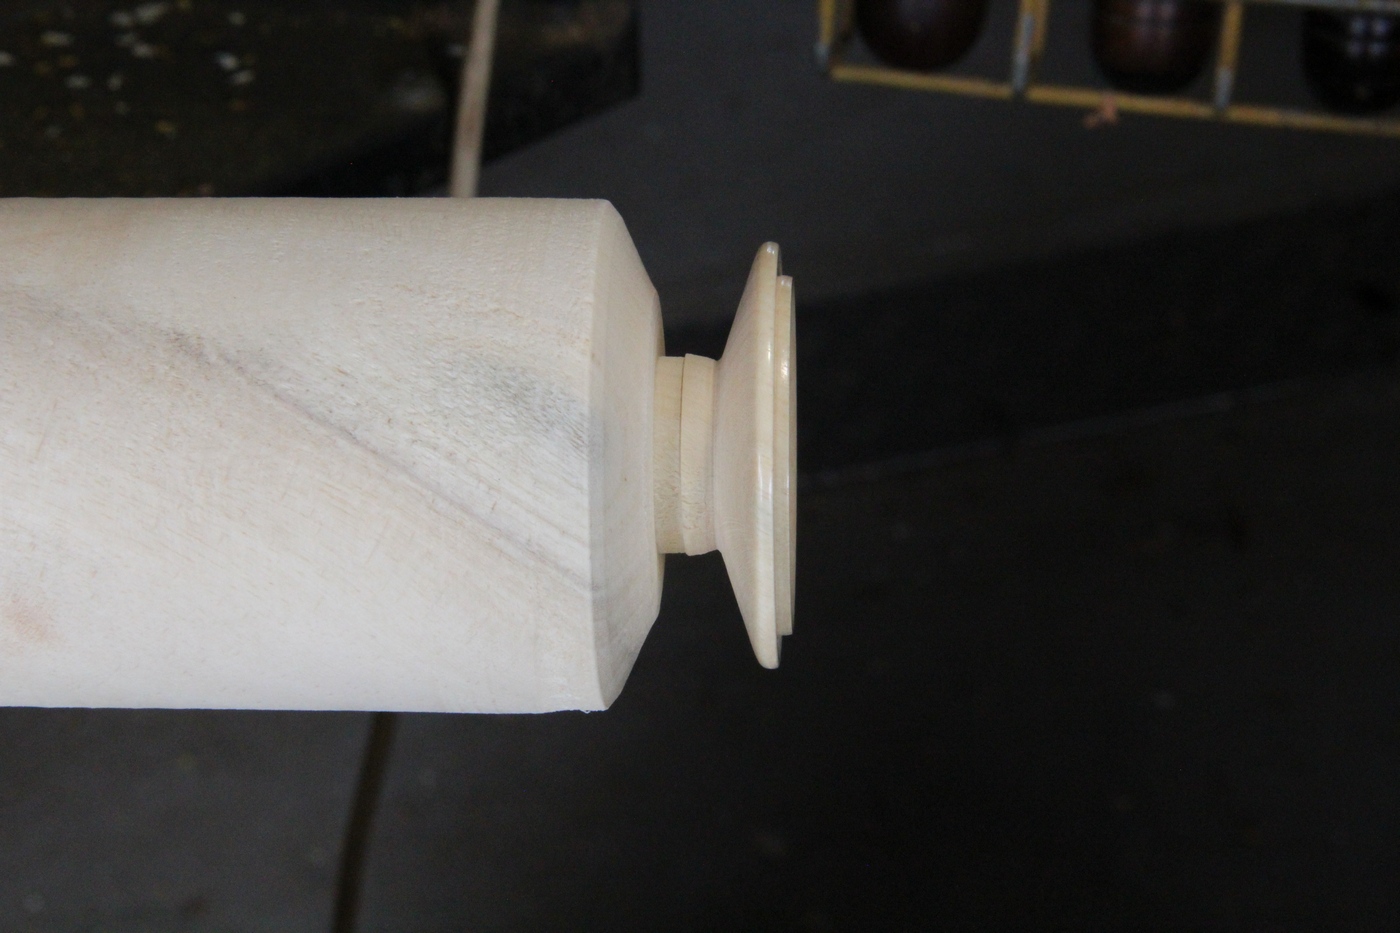
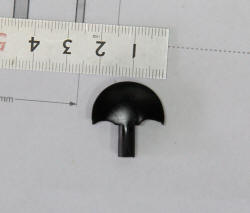
Turn the lid next - it does NOT need to be a snap-fit - a little
loose is good on this project to ensure it drops fully home. The lighter
the lid is the better, so try and turn it as thin as practical.
|
|

Sand and finish the underside and lip of the lid, then drill the
12mm hole to take the carrier post.
You can include a knob/finial if you're happy for it to use the same
timber, then part the lid off the blank..
|
|
 If
you're making a separate knob for it, reverse the lid in the chuck,
gently to avoid denting the lip, and finish the top side. Drill a hole
to suit your choice of knob/finial. I used a 5mm hole on this one to
take a hand shaped knob I will make later. If
you're making a separate knob for it, reverse the lid in the chuck,
gently to avoid denting the lip, and finish the top side. Drill a hole
to suit your choice of knob/finial. I used a 5mm hole on this one to
take a hand shaped knob I will make later.
|
|
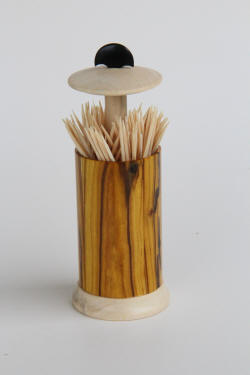
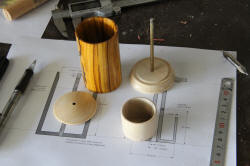
So far so good! . Now for the internals.
|
|
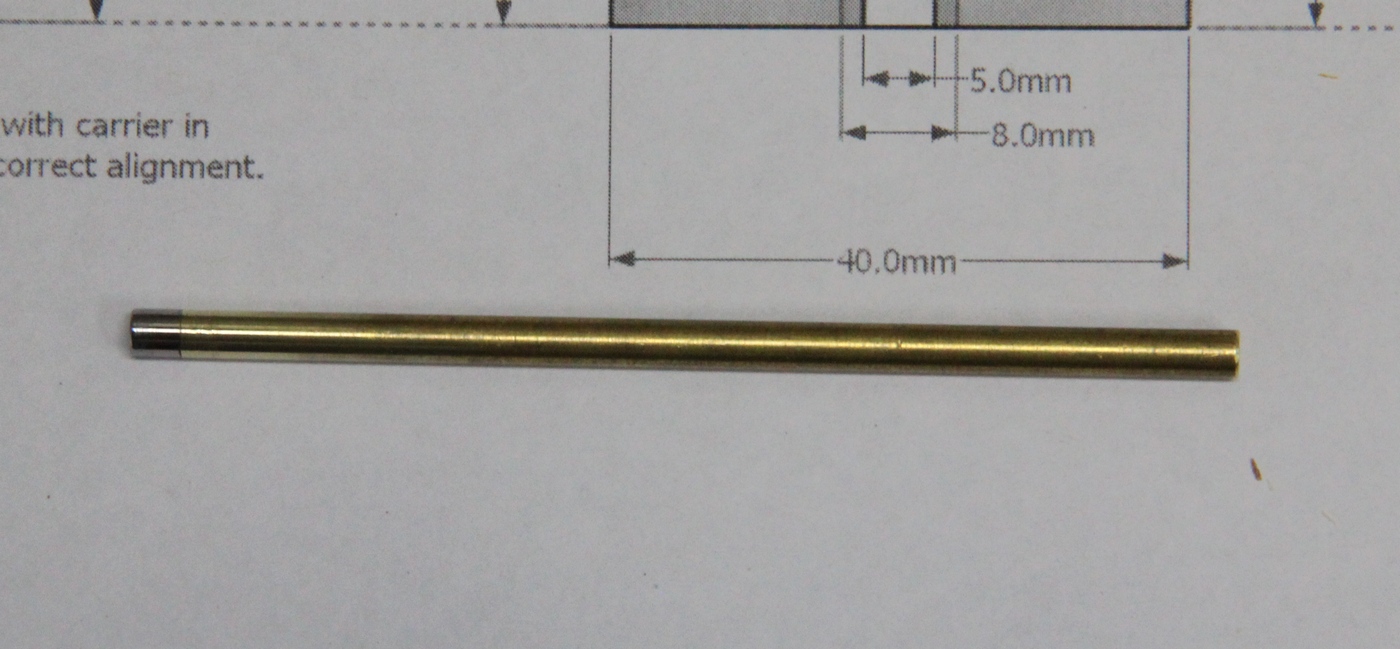
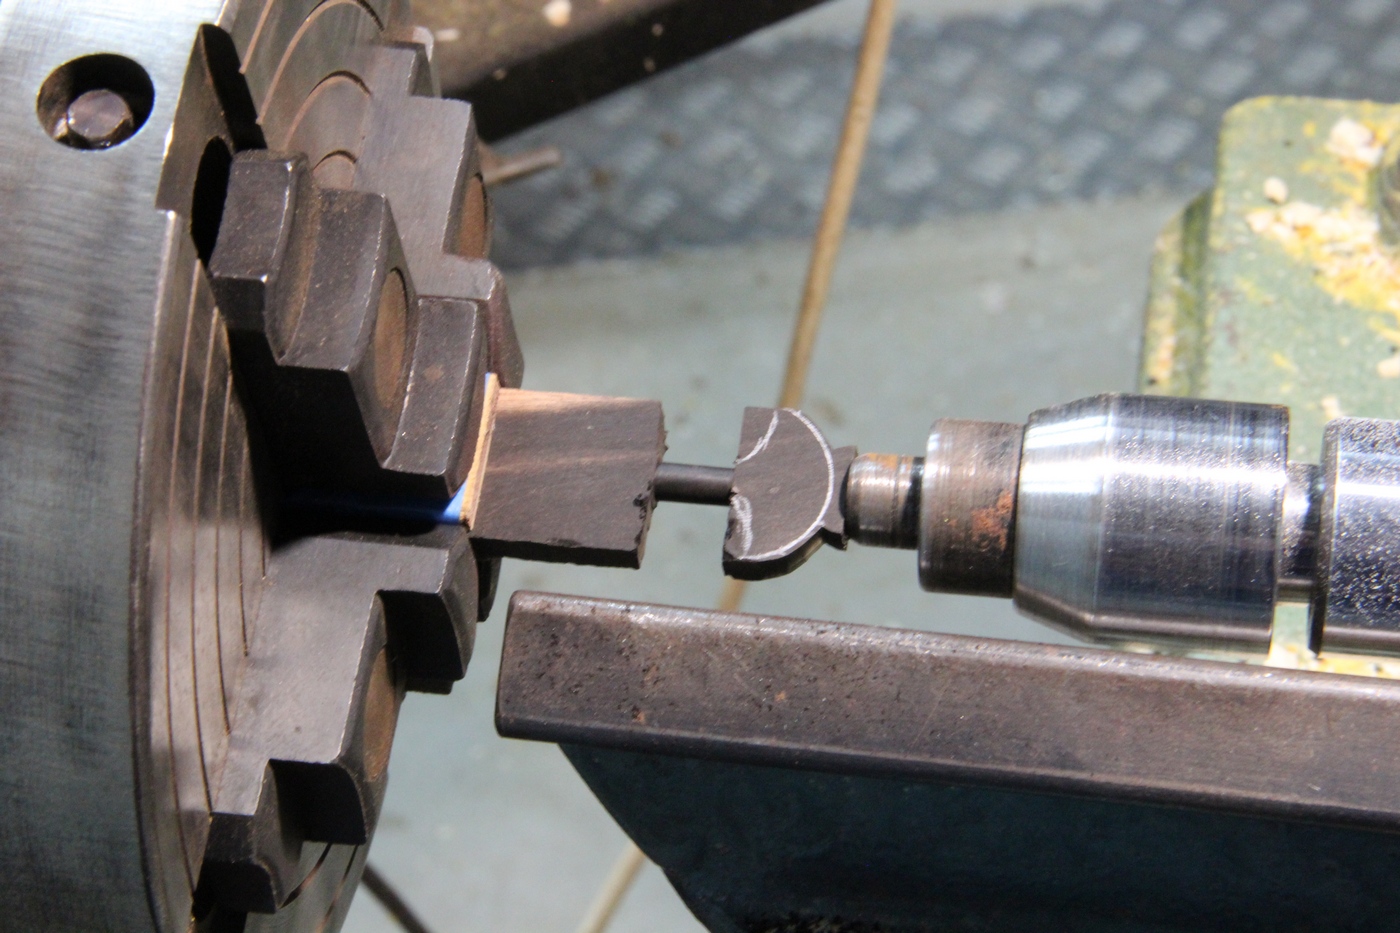
Now is a good time to get your centre shaft ready. You can use any
non-magnetic material for this part - wood, plastic, aluminium, doesn't
matter, as long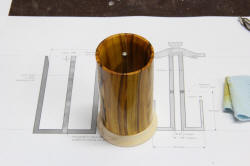 as it stays straight and you can attach a small piece of steel/iron to
the end of it. I used 3/16" brass rod on this one and turned a small
step on the end which I slipped a steel sleeve over. In the past, I
have just turned the diameter down on the end to suit the thickness of
some garden tie-wire and wrapped that around it with a dob of CA to make
sure it stayed put - worked fine!
as it stays straight and you can attach a small piece of steel/iron to
the end of it. I used 3/16" brass rod on this one and turned a small
step on the end which I slipped a steel sleeve over. In the past, I
have just turned the diameter down on the end to suit the thickness of
some garden tie-wire and wrapped that around it with a dob of CA to make
sure it stayed put - worked fine!
|
|
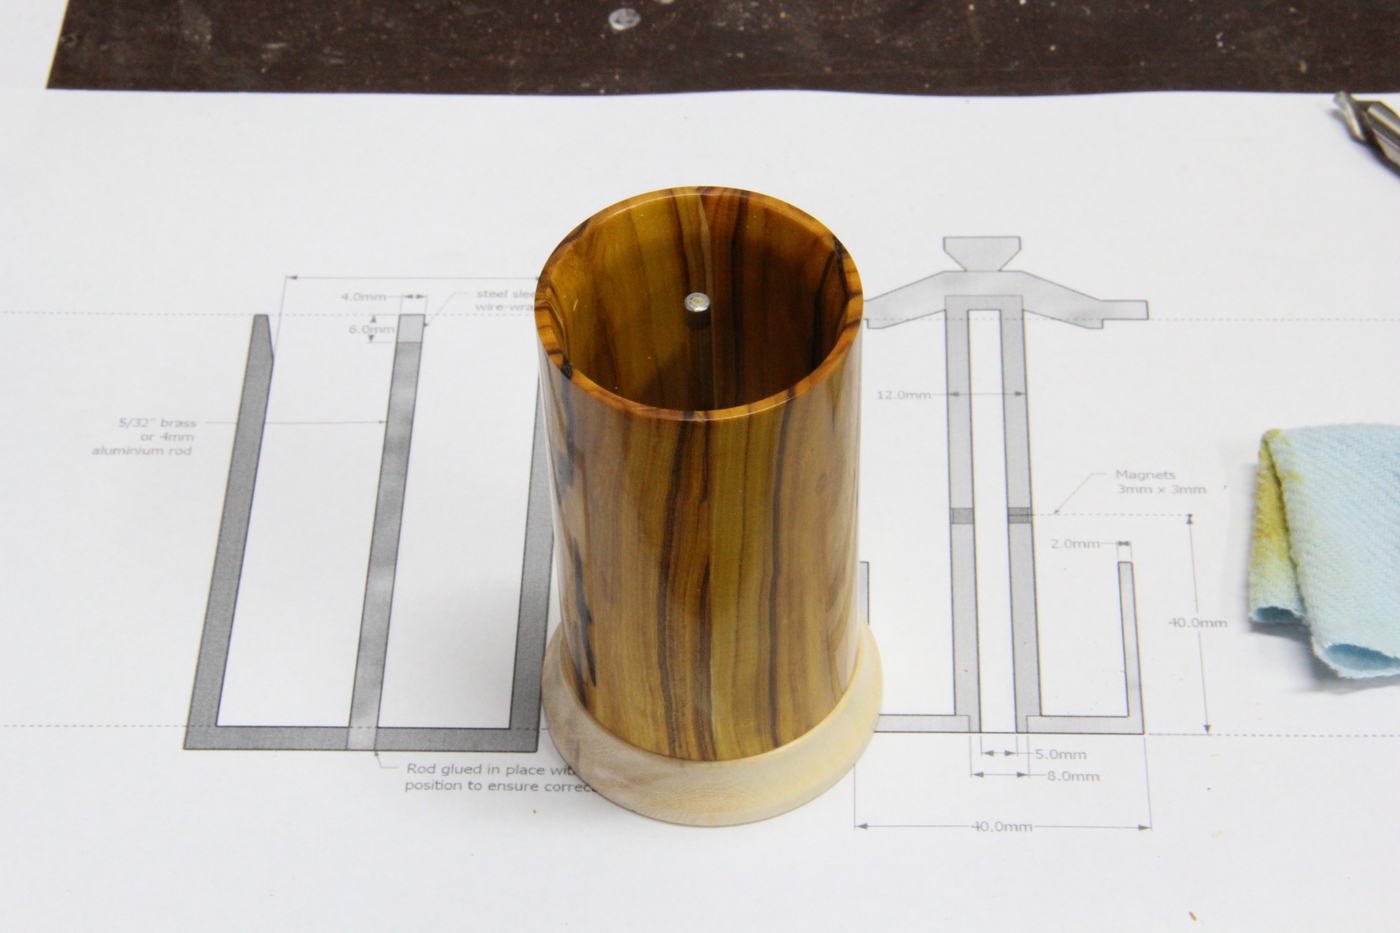
 A light-weight timber is best for the cup and connecting tube - the
lighter it is, the less magnet-power you need later.
A light-weight timber is best for the cup and connecting tube - the
lighter it is, the less magnet-power you need later.
Turn the outside down to about 1mm less than the internal diameter
of your cylinder - it should slide easily through the length of the
cylinder.
|
|

Drill/turn the inside of the cup to leave about a 2mm wall and 3 or 4mm thick base.
Drill an 8mm hole through the base then part the cup off.
|
|

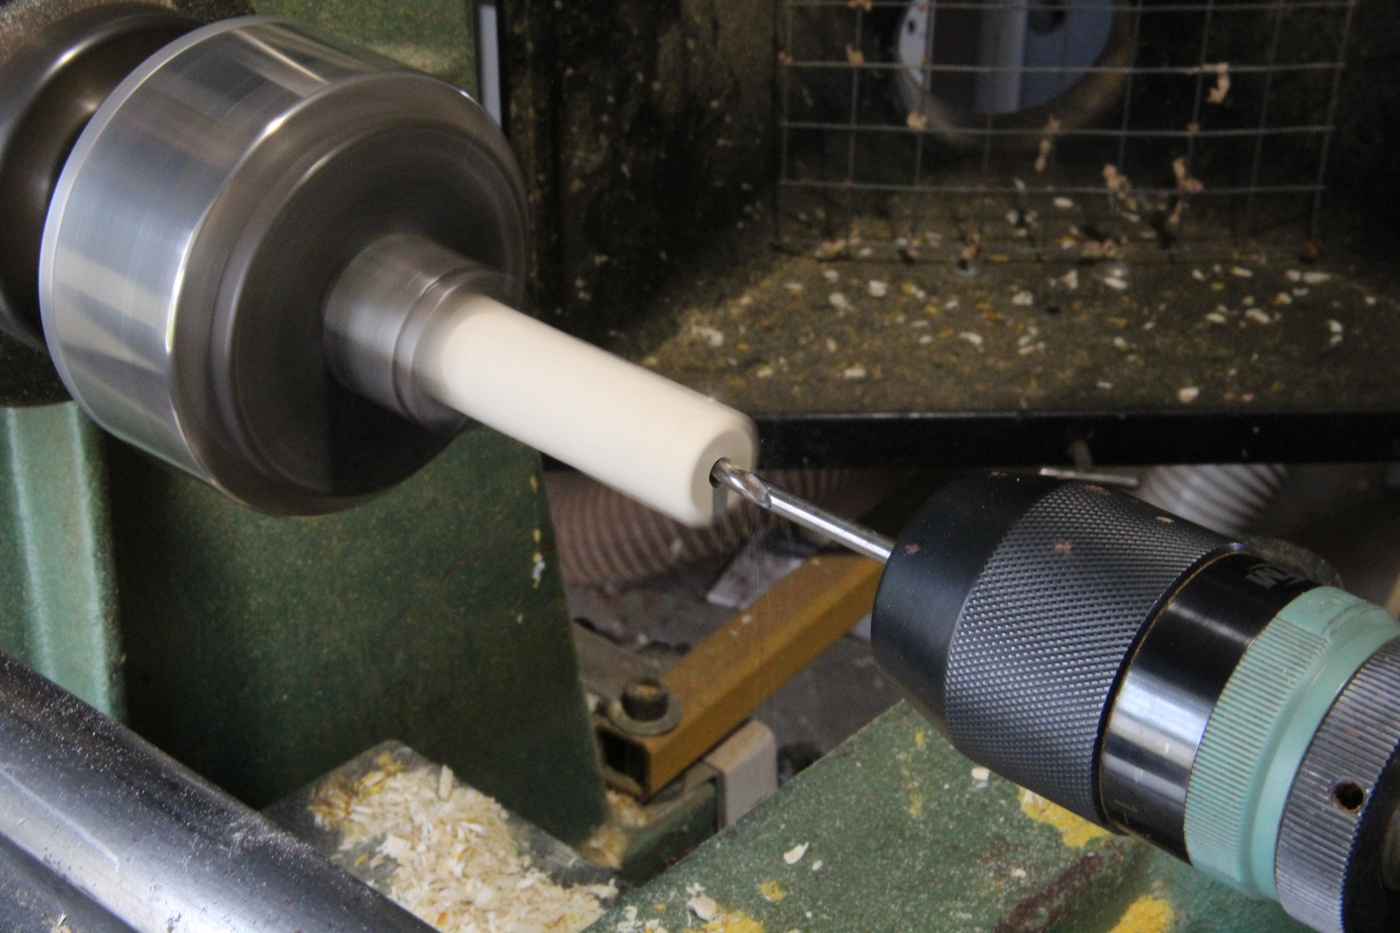
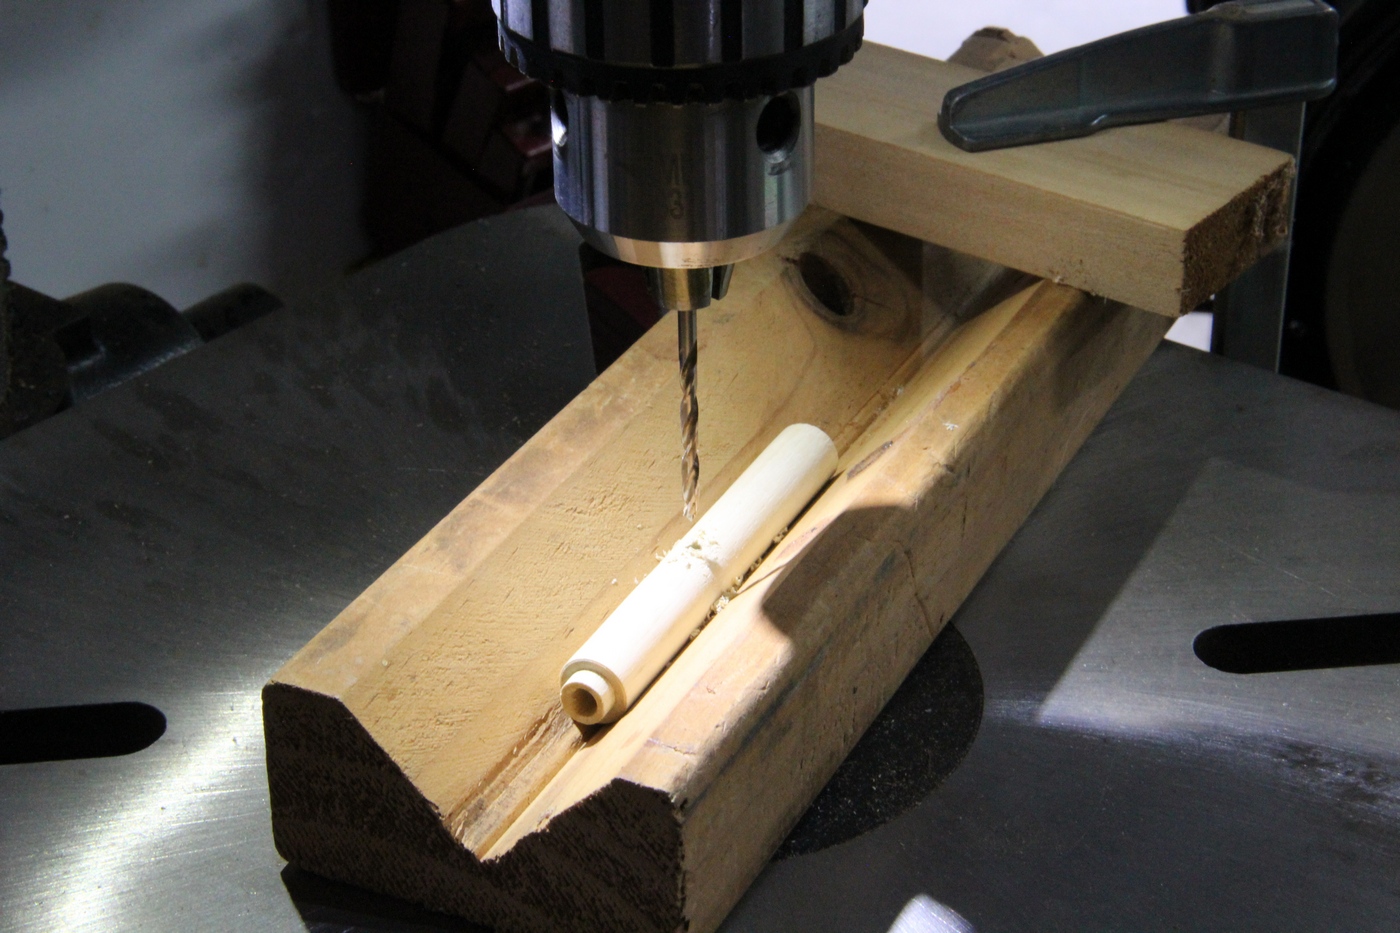
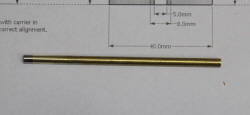
Drill your connecting tube blank (which should be a couple of mm
over length) right through with a drill just a bit larger then the rod
you're using for the centre shaft BEFORE you turn the outside.
 A longer than standard drill bit is the best bet here. You can try
drilling in from each end with a standard bit but if the finished hole
isn't dead straight, the dispenser is not going to work very well. The
long bit is very likely to wander off course, but as pictured here, you
can still use the blank as long as the thinnest side is still greater
than 3mm.
A longer than standard drill bit is the best bet here. You can try
drilling in from each end with a standard bit but if the finished hole
isn't dead straight, the dispenser is not going to work very well. The
long bit is very likely to wander off course, but as pictured here, you
can still use the blank as long as the thinnest side is still greater
than 3mm.
|
|

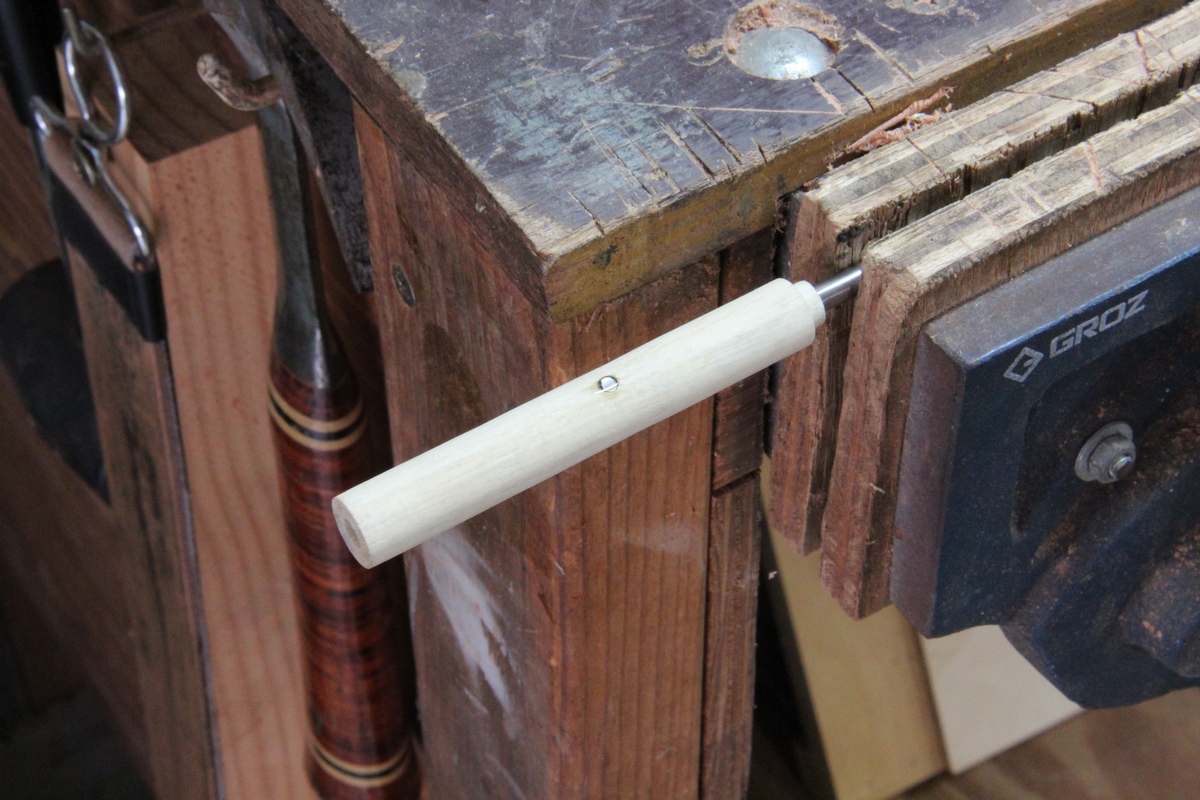
Now you can turn the outside down to size with the blank mounted
between the ends of the hole to ensure everything is true to the hole.
Turn the step on one end to 8mm to suit the cup and test it for fit -
any excess can be trimmed off later.
|
|

Drill 2 holes at right angles to each other(measured up from the
cup-end) to suit your magnets diameter. 
I started out using 3mm magnets opposite each other, but changed on
this dispenser to 5mm magnets at right-angles and found they will still
fit in the connecting tube OK but get a far better grip on the shaft.
|
|

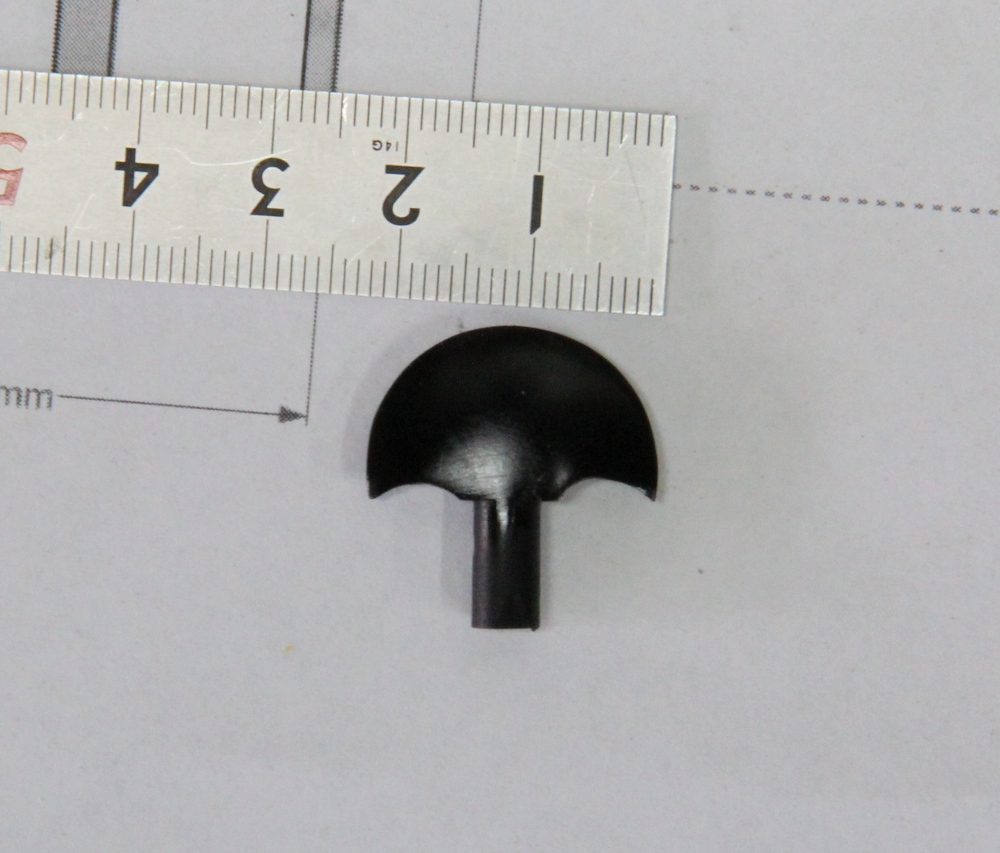
To hold the magnets in place, I slip the tube over a steel rod and
position the magnet so it touches the rod, then put just a drop of CA on
the magnet which holds it nicely.
|
|
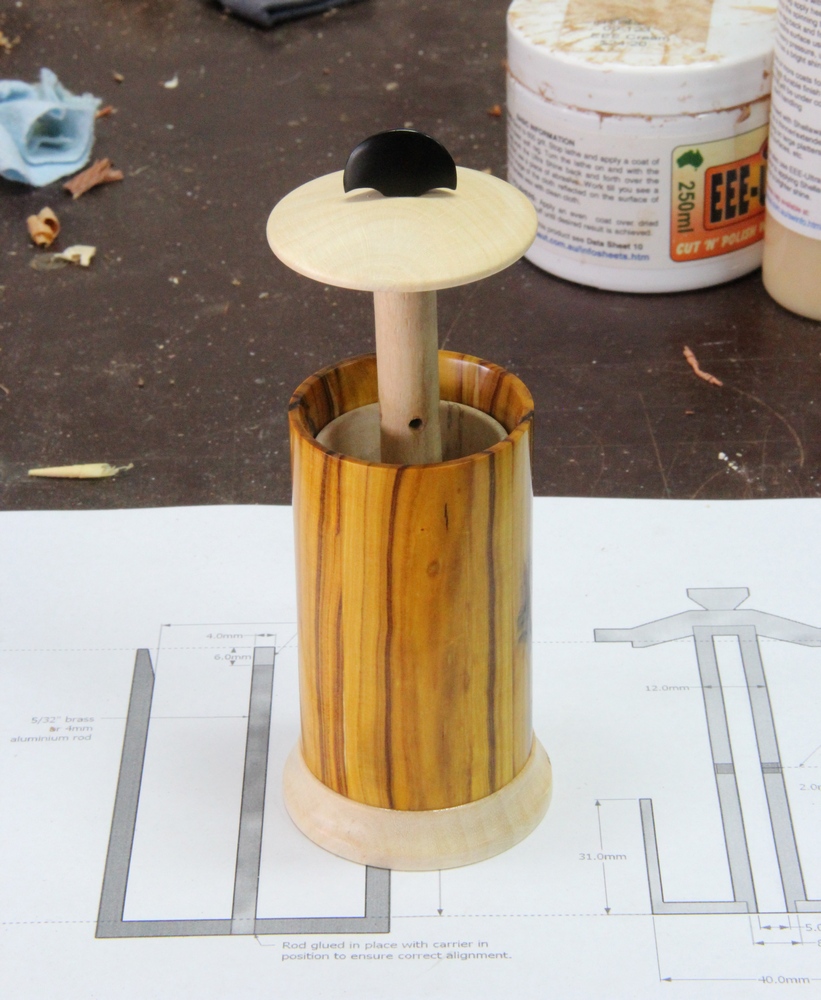
Forgot to take a pic of the next step. Sit everything together and
the lid should be sitting up above the cylinder by a couple of mm.
Measure the gap from the top of the cylinder and the lid, then cut that
distance plus 1mm of the connecting tube - this will keep the cup from
hitting the bottom of the dispenser. If everything seems to fit OK, glue
the bits together, taking care not to get excess glue down the connecting
tube.
|
|

For this dispenser I finally found a use for that old 4-jaw chuck
I've had for about 12 years and never used!!! No such thing as waste
timber - managed to get a passable knob from this other wise useless
piece of Australian Ebony.
|
|

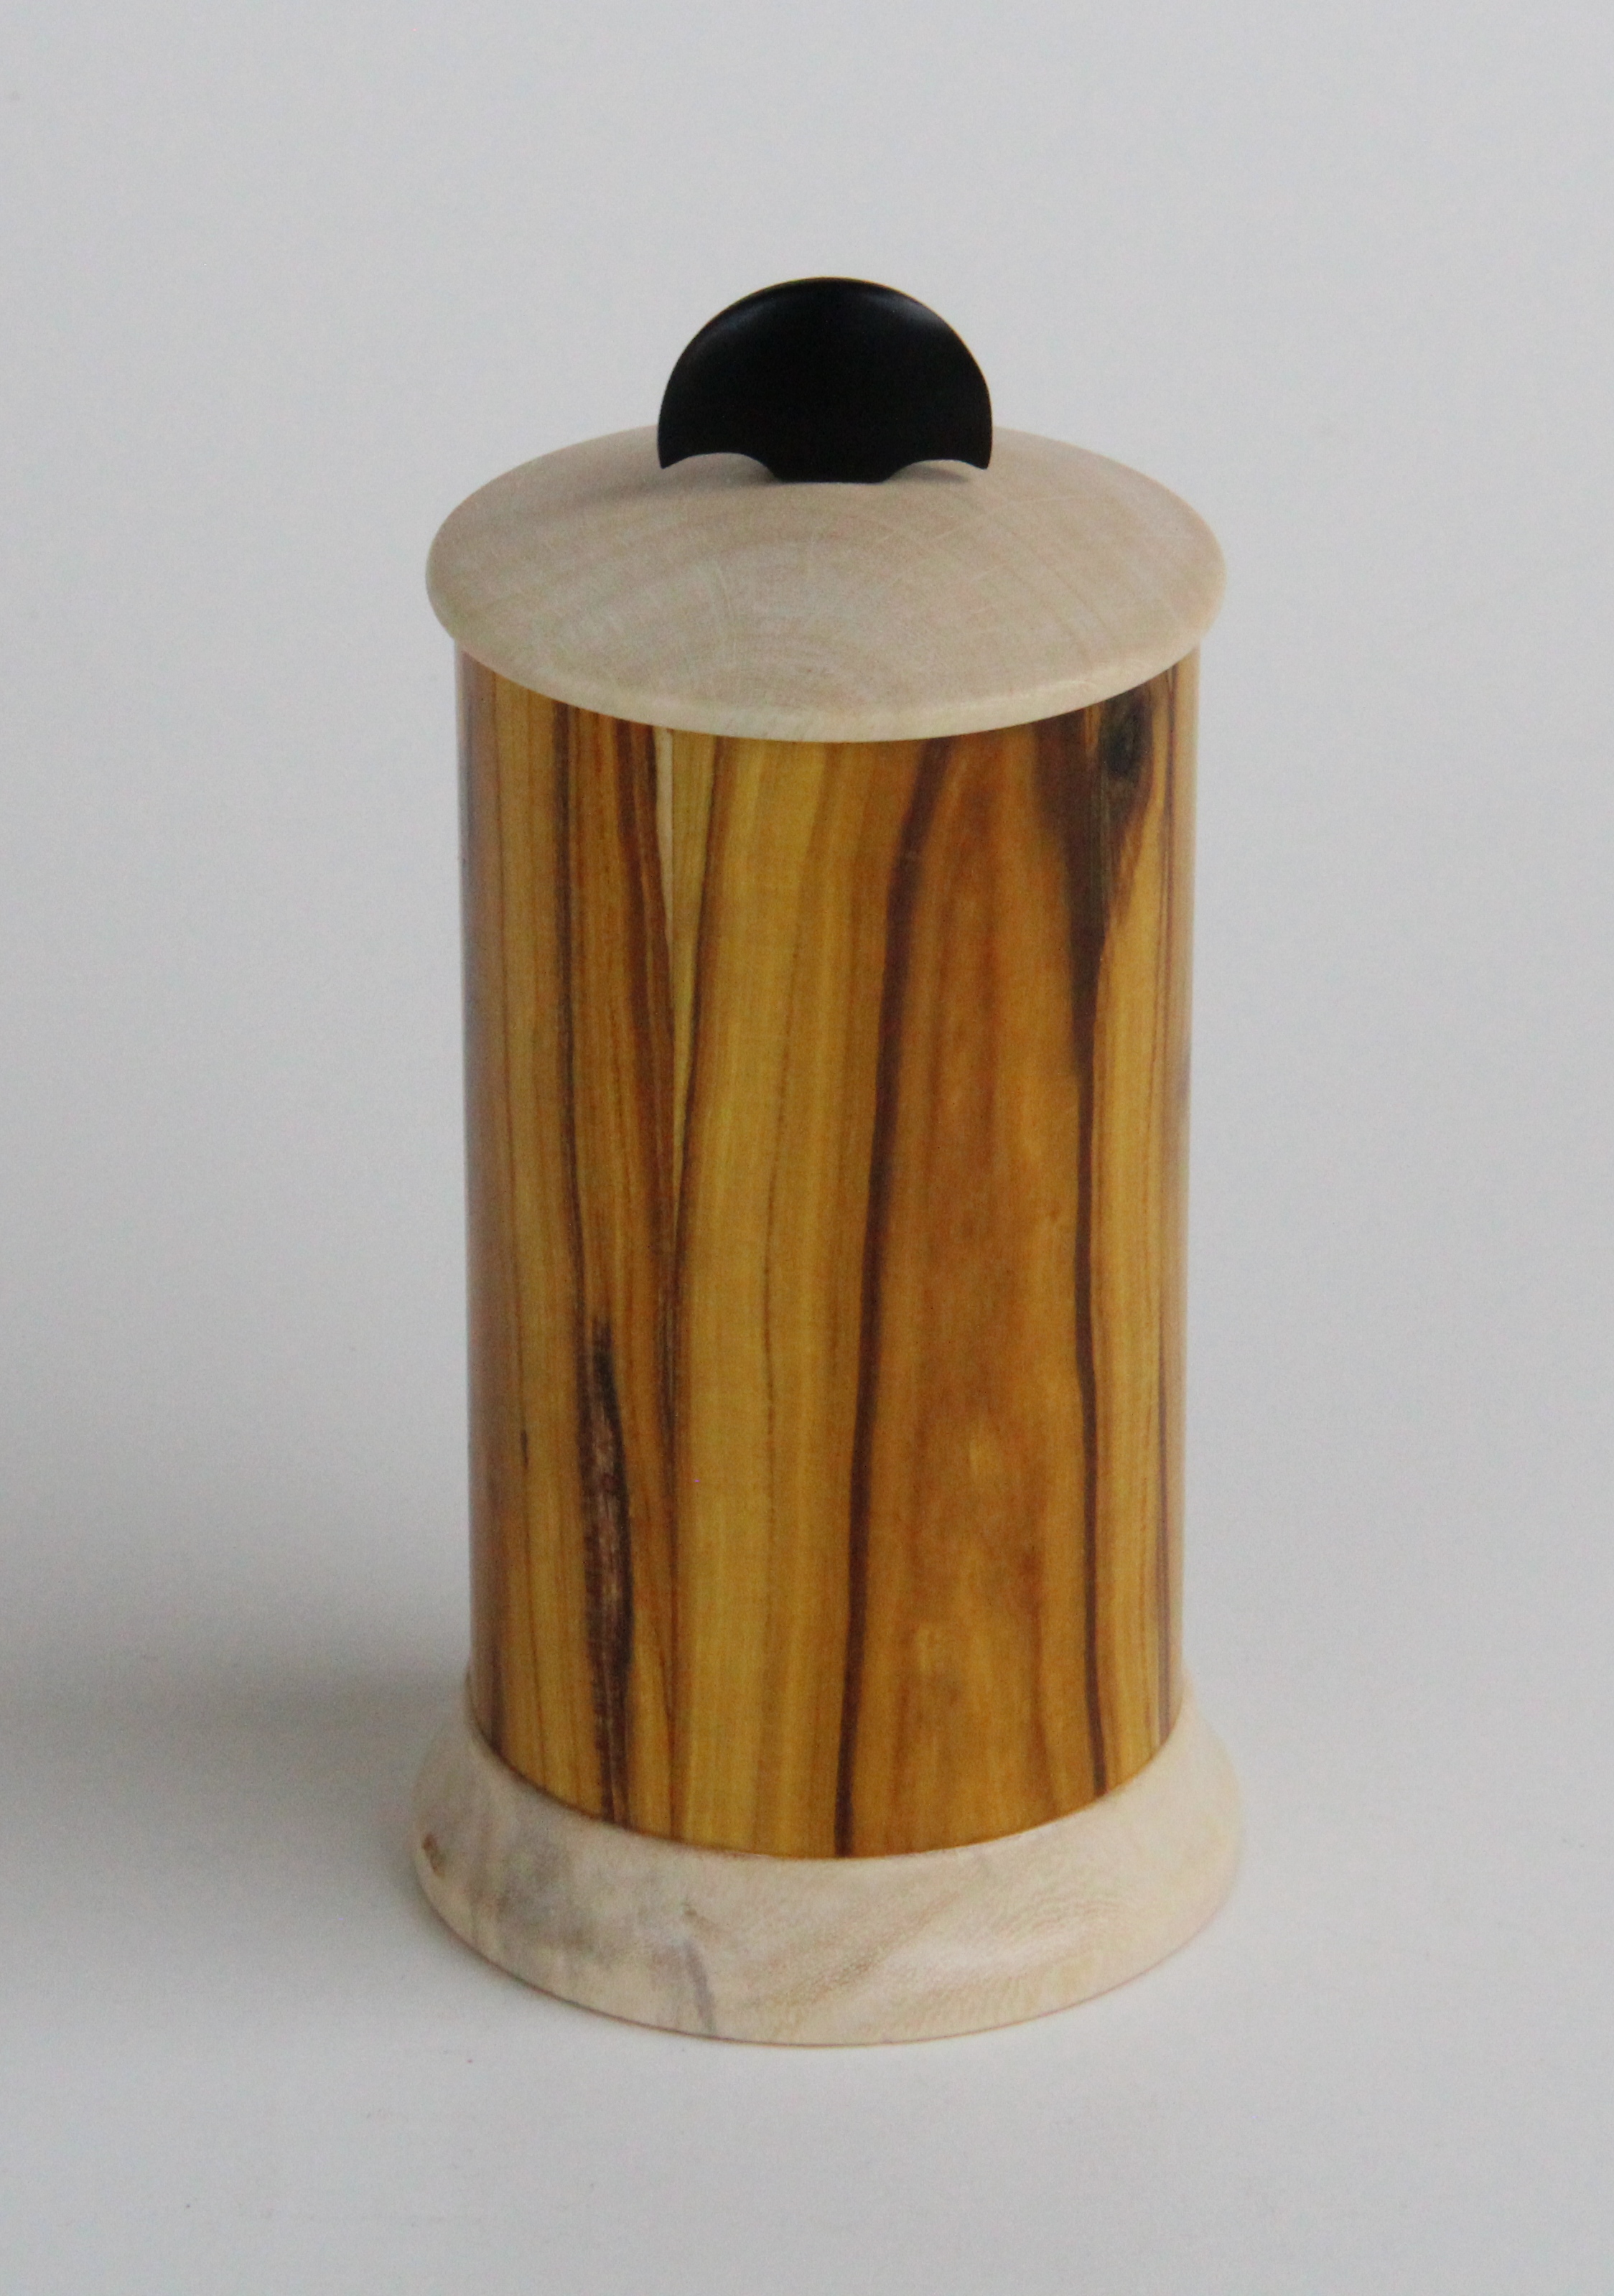
And we're done!
Please use the Feedback form for
any questions or comments on this project.
|
|
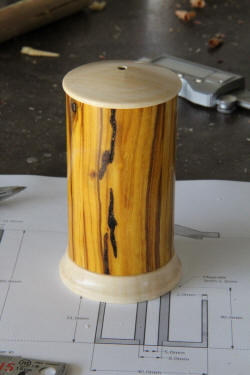
The Evolution of an idea.
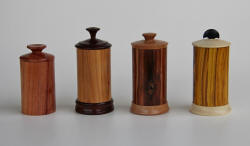 From left to right . . . From left to right . . .
1. Prototype made from a solid blank of
Zig-zag Wattle - worked well but the
base was a bit light and tends to lift with the carrier.
2. Used a Gidgee base for more weight but messed it up by using
Gidgee for the cup as well - way too heavy so it took 4 magnets to just
barely hold the carrier up.
3. Our daily user -
Hopbush cylinder with
Red Olive Plum lid
and base - got the balance just right in this one.
4. Purple Bush-pea cylinder with Norfolk Island Hibiscus base and
lid - one for the gallery.
|
|
|